- Download and install the software.
- It will scan your computer for problems.
- The tool will then fix the issues that were found.
To install Windows 10 preview on Virtual Machine, you need to meet the following system requirements.
CPU: Intel Core i5 2nd generation or better
Click the Restart Now button takes about 5 – 10 minutes.
The installation process might fail if your computer doesn’t meet the above requirements.
If you want to test out some of the new features before installing it on your primary computer, you can create another partition for testing purposes. You can do this by creating a new hard disk partition.
Step 1: Create a New Hard Disk Partition
1. Insert the DVD into the optical drive.
Install Hyper-V’s Windows 11
Microsoft recently announced the release of Windows 10 version 1809, codenamed “Redstone 5.” This update brings several improvements to the operating system, including support for USB Type-C ports, better battery life, and improved security features. However, it also includes some changes that are less welcome, such as the removal of the Start menu and the return of the classic desktop interface. In addition, Microsoft is now offering Windows 10 Home users the option to switch to the Enterprise edition for free, meaning they no longer need to pay $120 per device.
To make sure you’re running the latest version of Windows 10, we’ve collected everything you need to know about Redstone 5, including how to upgrade to the newest build, what the differences are, and how to revert back to previous versions of the OS.
Step 1: Turn on Microsoft Hyper-V in Windows 10
To enable HyperV on Windows10, follow these steps: – Open the Services window and select HyperV Virtual Machine ManagerService under the list of installed services.- Set the startup type to Automatic,Manual, or disabled.- Once the system restarts the section and select the HyperVVirtual machine manager service.- SettheStartuptypeoptiontoeitherAutomaticorManuall.- ClickOKtoclosetheServiceswindow.
Step 2: On Hyper-V, create a Windows 11 virtual machine.
In this article we are going to show you how to install Windows 10 Pro on Hyper-V using PowerShell. This tutorial assumes that you already have a Hyper-V server running and configured. For additional information about creating a Hyper-V host please refer to our previous blog post here.
1. Open Hyper-V manager GUI or run the following command from PowerShell window.
# Start Hyper-V Manager GUI
Start-Service -Name “Hyper-V Manager” -DisplayName “Hyper-V Server Manager”
# Run PowerShell script
$hypervisor Get-WmiObject Win32_Product | Where { $_.Name -like ‘*Hyper-V*’ }
if ($hypervisor) {
Updated: February 2025
We highly recommend that you use this tool for your error. Furthermore, this tool detects and removes common computer errors, protects you from loss of files, malware, and hardware failures, and optimizes your device for maximum performance. This software will help you fix your PC problems and prevent others from happening again:
- Step 1 : Install PC Repair & Optimizer Tool (Windows 11, 10, 8, 7, XP, Vista).
- Step 2 : Click Start Scan to find out what issues are causing PC problems.
- Step 3 : Click on Repair All to correct all issues.

Step 3: Install Windows
To start the Windows 11 installation process, simply press the Start button located on the lower left corner of your screen. This brings up the Start menu where you can choose to either restart your computer or open the Windows Setup Wizard. You will now see information about your current version of Windows as well as the operating system version number. Select the More info link next to the Operating System Version Number. This opens a window showing you the Windows version number.
When you are ready to begin installing Windows 11, select the Windows Setup Wizard icon from the list of options. This will launch the Windows Setup wizard. Follow the instructions onscreen to complete the Windows 11 setup.
After the installation completes, you will see the following prompt: “Would you like to set up a restore point?” Click Yes to continue.
If you do not wish to use a restore point, skip ahead to Step 4. Otherwise, follow the steps below to make sure everything goes smoothly during the Windows 11 installation.
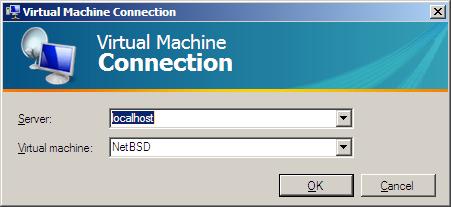
Hyper-V Virtual Machine Connection
Microsoft Hyper-V Server 2016 added a feature called the “Virtual Machine Connection.” This allows administrators to connect directly to a Hyper-V server running Windows 10 Pro, Enterprise, Education, or Datacenter editions. Administrators can use PowerShell cmdlets to manage VMs remotely. They can also use the Remote Desktop Protocol (RDP) to access the desktop of a remote VM.
The connection does not require administrator privileges. A guest operating system must support RDP. Microsoft recommends that administrators enable the option “Allow connections from computers running any version of Windows,” under the Local Policies section of Group Policy Editor.
Make a Windows 11 virtual machine in Hyper-V.
Hyper-V is Microsoft’s virtualization technology. It lets you run multiple operating systems simultaneously on one physical computer. This article discusses how to manage different scheduling modes of the Hyper-V hypervisor.
The three main scheduling modes are preemptible, co-operative, and exclusive. Preemptible mode is used for guest operating system startup. In this mode, the hypervisor schedules each VM independently. Co-operative mode is used for running VMs concurrently. Exclusive mode is used for running multiple VMs on the same physical server.
Preemptible Mode
In preemptible mode, the hypervisor runs each VM independently. When a VM starts up, it gets control over the processor and memory resources. The hypervisor does not schedule the next task for the VM. Instead, it gives priority to another VM that needs CPU cycles and RAM.
Co-operative Mode
When you enable co-operative mode, the hypervisor allocates CPUs and RAM to each VM equally. If there are no free resources, the hypervisor puts idle VMs into standby mode. A VM goes into standby mode when it is waiting for some resource to become available. For example, a VM waits for network access, disk space, or RAM. When a VM enters standby mode, it loses control over the processor and RAM. However, it keeps control over the NIC and hard disks.
Exclusive Mode
In exclusive mode, the hypervisor assigns specific processors and RAM to each VM. There is no sharing of resources among VMs. Each VM gets full control over the processor and the RAM.
RECOMMENATION: Click here for help with Windows errors.
Frequently Asked Questions
On Windows 10, how to install Hyper-V
Hyper-V is a virtualization technology that lets you run multiple operating systems on one physical machine. You can use it to test out different versions of Windows, Linux, Android, Chrome OS, and even macOS without having to install each one separately. In addition, you can use it to create development environments for web applications, mobile apps, and desktop programs.
What is Hyper-V?
Hyper-V is a brand new technology built into Windows 10. It allows you to run multiple operating systems simultaneously on one computer.
You don’t need to install virtualization software like VMware Workstation or VirtualBox. Instead, you can use Hyper-V to run several different versions of Windows on one physical machine.
This makes it easier to test out different versions of Windows. For example, you could try out Windows 7 or 8.1 on a laptop while running Windows 10 on another PC.
You can even keep older versions of Windows around just in case you make a mistake and want to rollback to an earlier version. If you mess up, you can always go back to the previous version of Windows.