- Download and install the software.
- It will scan your computer for problems.
- The tool will then fix the issues that were found.
Windows Update Error 0x8007002a is one of the most common issues faced by PC users. While it seems harmless enough, it can actually cause serious damage to your system. If you encounter this error while trying to download updates, it could mean that there is something wrong with your operating system. In some cases, it might indicate a virus infection. However, there are some steps that you can perform to fix this issue. Here are some tips on how to fix Windows Update Error 0x80004005.
If you receive this error while updating your device, you need to restart your machine. You can do this by pressing Ctrl+Alt+Del keys together. Once you press these three buttons, select Start Task Manager. Then, find out whether your antivirus program is running. If you don’t see anything related to your antivirus program, close it down completely. After doing this, open up the Control Panel and go to Programs and Features. Find out whether your antivirus application is listed under Uninstall/Change. If it isn’t, uninstall the program. Next, check whether Windows Defender is installed. If it is, disable it. Now, start the Windows Update again.
Fix Windows Update Errors 0x8007012c
This error usually happens due to a corrupt registry entry. Therefore, you need to delete the problematic entries manually. Go to HKEY_LOCAL_MACHINE\SOFTWARE\Microsoft\Windows NT\CurrentVersion\WindowsUpdate. Delete the following key: InstallerPath. Also, make sure that the value associated with it is set to “C:\Program Files\Windows Updates”. Finally, run Windows Update once again.
Fix Windows 10 Error 0x80070490
If you are still getting this error despite everything we mentioned above, you need to reset your network connection settings. First, turn off your Wi-Fi router. Then, disconnect your modem and power cable. Wait for about 5 minutes. Turn on your modem and power cable again. Connect to the internet via Ethernet cable. When you’re done, reconnect your Wi-Fi router and turn it on.
Method 1. Use the Troubleshooter for Updates
To repair damaged system, you need to download the licensed version of reImage. You can do it directly from our site. After downloading, install the program and run it. Follow the instructions on the screen. If you don’t know how to use the software, watch the video tutorial.
Method 2. Background Check on Intelligent Transfer services
To fix an error like “Windows cannot access the specified Device, Path or File”, you should check the background Intelligent Transfer Service. This method will help you solve the problem of “Cannot Find A Suitable Driver”. You must restart the computer After Installing Software.
Method 3. Repair Corrupted System Files
The third method is used to repair corrupted system files, including registry errors, startup problems, file access issues, program compatibility errors, and many others. This method can fix most software related errors. If you are facing some serious problem while installing or uninstalling any application, it is advisable to use this method.
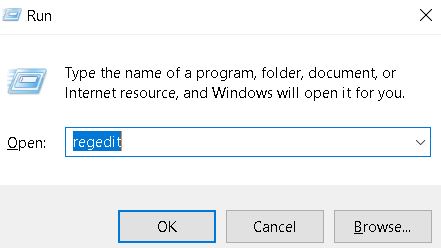
Step 2 – Click Start button to open the Run dialog box. Type “regedit” without quotes and press Enter to run the Registry Editor.
Step 3 – In the left pane, locate HKEY_LOCAL_MACHINE\SOFTWARE\Microsoft\Windows NT\CurrentVersion\Winlogon and double-click on the Startup folder.
Step 4 – Double-click on the DefaultUserName key and change the value to your username.
Name the string value as “PasswordNotify”. Set the data type to Unicode text (String). Then set the value to the following: “%SystemRoot%\system32\rundll32.exe shell32.dll,Control_RunDLL %1 /u /r /c “”C:\ProgramData\Microsoft\Windows\Start Menu\Programs\Accessories\ease of access.lnk”””””
Step 6 – Close the Registry Editor and restart your computer.
Note: You can try Method 1 or Method 2 to solve the issue.
Updated: July 2025
We highly recommend that you use this tool for your error. Furthermore, this tool detects and removes common computer errors, protects you from loss of files, malware, and hardware failures, and optimizes your device for maximum performance. This software will help you fix your PC problems and prevent others from happening again:
- Step 1 : Install PC Repair & Optimizer Tool (Windows 11, 10, 8, 7, XP, Vista).
- Step 2 : Click Start Scan to find out what issues are causing PC problems.
- Step 3 : Click on Repair All to correct all issues.

Method 4. Check Disk
If you are getting error messages while trying to install Windows 10, it could mean that your hard drive is damaged. In such cases, it becomes necessary to run a system scan to repair corruptions and errors on your PC. This process involves scanning the entire hard drive and fixing any issues found during the scan. If you want to perform a deep scan of your hard drive, use our free tool called Reimage Plus. It allows you to safely scan, diagnose and repair your operating system, recover lost files and eliminate virus infections. You can find out how to do it by following the steps given below.
Step 2. Download Reimage Plus
Click here to start downloading the program. After installation completes, close all programs and windows on your device. Open the folder where you saved Reimage Plus. Double-click on ReimagePlusSetup.exe icon to launch the setup wizard. Follow the prompts. When prompted about uninstalling previous versions of Reimage Plus, select Yes.
Step 3. Scan Your Computer With Reimage Plus
Once installed, double-click on Reimage Plus icon on your desktop. A window like shown below will open up. Click on the “Scan Now” button. Wait till the full scan gets completed. Note down the location of detected problems.
Step 4. Fix Corrupted Files And Registry Entries
Right-click on Command Prompt option and select Run As Administrator. Once command prompt opens, type each of the commands mentioned below one by one and press Enter after every command.
Method 5. Reset every Windows Update Component
Resetting Windows Update Components is a complex task that involves several steps. In this article we will show you how to do it step by step. We will explain what each component is used for, why you might want to reset it, and how to go about doing it.
This guide does not cover every single case where you might encounter a problem. There are many different reasons why you could see this specific error. For example, some people experience problems because they installed multiple antivirus programs at once. Other people experience issues because they use third party software that conflicts with the Microsoft update system. Still others experience problems because they updated to Windows 10 version 1903 and later versions.
Before starting, make sure that you have backed up all of your files and folders. You should always keep a copy of your most important documents and media stored offsite just in case something happens to your computer. Also, make sure that you know how to restore your operating system to factory settings. If you don’t know how to do that, please read our guide How to Restore Your Computer to Factory Settings.
Step 1 – Open Control Panel. Step 2 – Type “wusa /uninstall /kb {KB_ID}” into the command prompt window and press Enter. Replace KB_ID with the number corresponding to the KB you wish to uninstall.
Step 3 – After uninstalling the KB, restart your PC.
Step 4 – Restart your PC again.
Method 6. Download the Updates Manually
Microsoft released a security update earlier today that addresses several vulnerabilities in Windows 10. One of those issues affects the way Microsoft rolls out updates to Windows 10 devices. If you are experiencing problems installing the patch, follow our instructions below.
If you receive error messages while trying to install the update, try downloading it again. You may also want to check if your computer meets the requirements listed here.
Step 1. Step 2. Click Get Started.
Step 3. Select Troubleshoot.
Step 4. Choose Advanced Options.
Step 5. Under Reset this PC, select Troubleshooting Information.
Method 7. Update via Media Creation Tool
If you are having problems updating Windows 10, try running Reimage Plus. This free software repairs most issues associated with Windows 10. If you still experience errors, we recommend trying out our free scan.
Reimage Plus is compatible with both 32bit and 64bit versions of Windows 10. You can download the latest version directly from the developer’s site.
The following steps work for most people. 1. Download the installer file
2. Run the installer
3. Follow the instructions
Repair your Errors automatically
uGetFix is a powerful utility that helps you repair your errors without wasting your precious time. You don’t need to worry about anything else because it can do everything for you.
With uGetFix, you can scan your computer for errors and problems, and fix them quickly and easily. If there are some serious issues, our experts will help you to resolve them. All you need to do is just follow the instructions carefully.
You can use uGetFix to fix Windows system files, registry entries, browser cache, cookies, temporary files, Internet Explorer history, etc. And it doesn’t matter whether you’re running Windows XP, Vista, 7, 8, 10 or even Server 2008/2008 R2/2012/2016/2019.
Features:
* Scan & Repair – Quickly scans your computer for errors and repairs them automatically.
* Fix – Automatically fixes common errors such as missing DLL files, invalid shortcuts, corrupted system files, broken drivers, orphaned processes, etc.
* Cleanup – Removes junk files, temporary files, cookies, browsing data, etc.
RECOMMENATION: Click here for help with Windows errors.
Frequently Asked Questions
What exactly is the function of Windows Update?
Keeping your computer up to date with the latest security updates for Microsoft products like Internet Explorer, Office, and Windows itself is accomplished through the use of Windows Update. Additionally, it will install any available updates for apps that you have manually installed or obtained from the internet.
How Frequently Should I Check to See If There Are Any Updates?
At the very least once every week, you need to check for any new developments. If you are utilizing an automatic update system (such as Microsoft Update), then you need to check for updates once per day or two at the absolute least.