- Download and install the software.
- It will scan your computer for problems.
- The tool will then fix the issues that were found.
In this article we are going to show you how to create a virtual machine on Windows 10. We will use Microsoft Hyper-V Manager GUI tool. In this tutorial, I am assuming that you already know what is hypervisor and virtualization. If you don’t know about it, please read my previous articles related to virtualization.
Step 1 : Open Hyper-V manager GUI tool. A window will open up where you can see different tabs like General Settings, Storage settings, Memory settings etc. Let us start with the general tab.
Step 3 : Fill out the following information:
Name – Enter a name for the VM.
OS Type – Select “Windows Server 2016 Datacenter”. This will give you access to many features including snapshots, Clonezilla Live ISO backup, and much more.
Size – Choose the size of the disk space you want to allocate to the VM. For example, if you choose 20 GB, then you will get 20GB free space.
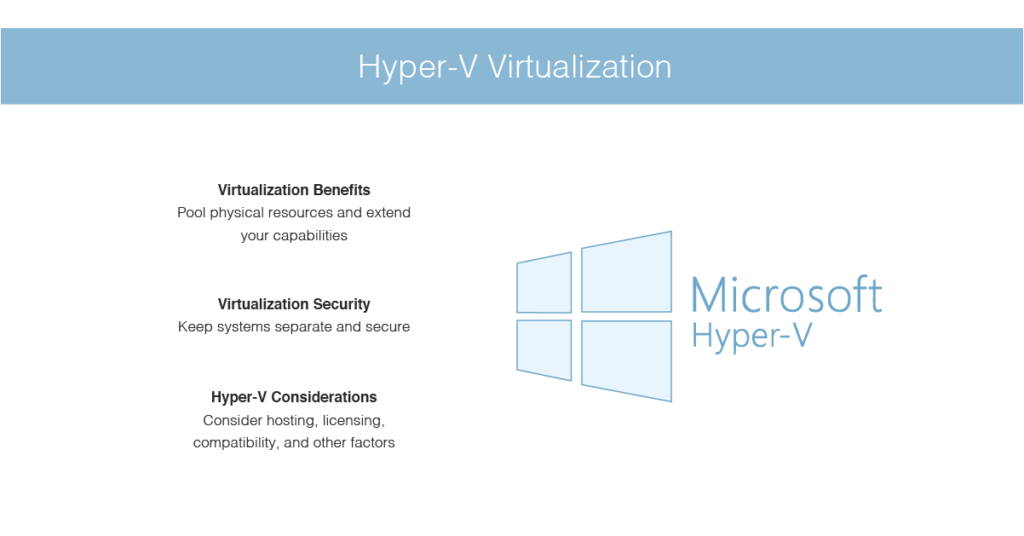
About Hyper-V
Hyper-V is a software solution that allows you to consolidate multiple VMs onto one physical machine. You can use it to host a variety of operating systems including Linux, Mac OS X, and Windows. In addition, you can install additional software such as databases, web servers, application servers, etc.
Hyper-V is supported on both x86 and x64 versions of Windows Server. It works with both 32-bit and x64 CPUs.
SLAT enables a VM to access multiple memory banks simultaneously. This reduces latency and increases bandwidth.
Hardware assisted virtualization provides hardware support to virtualize CPU extensions, page tables and I/O virtualizations.
Updated: January 2026
We highly recommend that you use this tool for your error. Furthermore, this tool detects and removes common computer errors, protects you from loss of files, malware, and hardware failures, and optimizes your device for maximum performance. This software will help you fix your PC problems and prevent others from happening again:
- Step 1 : Install PC Repair & Optimizer Tool (Windows 11, 10, 8, 7, XP, Vista).
- Step 2 : Click Start Scan to find out what issues are causing PC problems.
- Step 3 : Click on Repair All to correct all issues.

Windows 10 installation of the Hyper-V role
Hyper-V is one of the most important features in Microsoft’s Server 2016 operating system. This video tutorial explains how to install it on Windows 10.
Written By : Nathan Yau
GuitarIntro : “VideoGameMusic” Kevin MacLeod (incompetech.com)
Nathan’s Social Links
Hyper-V Virtual Machines: Building a Virtual Switch
A virtual switch allows multiple computers to connect to one physical network adapter. You can create a virtual switch so that you don’t have to manually assign each computer a different IP address. After creating a virtual switch, you can add it to a VM and use it just like a physical network adapter.
To create a virtual switch, follow these steps:
1.. Right-click Virtual Switching, select New, and then do one of the following:
2. Select Enable Virtual Switching for Physical Networks.
3. Select Disable Virtual Switching for Physical networks.
How to Create Hyper-V Virtual Machine
In this video we show you how to create a new virtual machine in Microsoft Virtual Machine Manager (MVM). We start off by creating a new virtual machine based on Windows Server 2016 Datacenter Edition. Then we add an additional NIC to the VM and assign it to a newly created virtual switch called “Hyper-v Switch”. Finally, we connect our new virtual machine to the Hyper-v Switch and configure some basic settings.
How to Use Hyper-V Manager to Create a Hyper-V Virtual Machine
Hyper-V manager allows you to create a virtual machine from scratch or use an existing virtual machine. You can also attach an existing virtual hard disk file to the virtual machine. In this article we will show how to create a Hyper-V VM using Hyper-V Manager. Before starting please make sure that you have already installed Microsoft Hyper-V server role on the host computer.
You can choose either “Create a virtual machine from scratch” or “Use an existing virtual machine”. If you want to start from scratch, then you do not need to install anything else. However, if you want to use an existing virtual machine, then you need to install the required components.
Step 2 – Select the option “From an image (.iso)” and browse to the ISO file containing the OS installation media.
The.ISO file contains the complete installation package including the Operating System, applications, drivers etc. Browse to the location where you saved it.
Step 3 – Specify the name of the virtual machine and specify the amount of RAM you’d like to allocate to the virtual machine.
Specify the name of the VM and the amount of RAM you wish to allocate to the VM. For example, I am going to create a VM named “Windows 10 Home 64 Bit.” So, I entered “Windows 10 Home 64bit” and selected 4 GB.
How to Use PowerShell to Create a Hyper-V Virtual Machine
Hyper-V virtual machines are one of the most important tools for server admins. They allow us to easily provision servers and run applications on our infrastructure. In addition, we can use them to test out different operating systems and configurations. However, managing Hyper-V virtual machines can be challenging because it requires a lot of manual work. Fortunately, there is a better way to do it. PowerShell is a programming language that makes it easy to script common administrative tasks. You can write PowerShell scripts to perform many of the same functions you would normally execute manually. This article explains how to use PowerShell to create Hyper-V virtual machine.
How to Use Hyper-V Quick Create to Create a Hyper-V Virtual Machine
Hyper-V Quick Create makes it easy to set up a new virtual machine quickly. This tool enables you to create a secure bootable virtual machine without checking the box “Enable Secure Boot.” You can also select the network adapter type of your newly created virtual machine.
To use Hyper-V Quick Create, follow these steps:
1. Open the Hyper-V Manager console.
2. In the dialog box, specify the name of the new virtual machine, the location where it will be stored, and the size of the disk space allocated to it.
3. Click Next.
4. Specify the operating system for your virtual machine. For example, Windows Server 2016 Datacenter Edition.
Starting a Hyper-V Virtual Machine
Select Create a virtual hard disk file and specify where it will reside. Specify how much RAM memory the virtual machine requires and whether or not to enable hardware acceleration. Next, choose either Windows Server 2012 R2 Datacenter Edition or Windows Server 2016 Essentials. Finally, select one of three options for what type of operating system you want to install: Windows 10 Pro, Windows 8.1 Pro or Windows 7 Professional. Click OK to continue.
Once the virtual machine is ready, you can log in and use it just like any other computer. If you are running the OS inside a virtual machine, there is no difference between installing software on a physical PC or a virtual machine. However, some applications require special privileges, such as administrative rights, to function properly. For example, Microsoft Office requires administrator rights to save files to certain locations.
If you plan to use the virtual machine frequently, consider creating a snapshot of it. This way, you can revert to a previous state if something goes wrong. Snapshots are similar to saving a copy of your document. When you take a snapshot, the virtual machine is saved in a.vhd format. A.vhd file is essentially a compressed image of a virtual hard disk. You can restore a snapshot to a virtual machine just as easily as restoring a backup file. Choose the snapshot you wish to restore and click OK.
Protecting Hyper-V VMs with NAKIVO Backup & Replication
Backup and replication are essential for protecting data and ensuring availability. With Hyper-V virtual machines (VM), it’s even more important because there are no traditional physical backups. In addition, Hyper-V VMs often run applications that cannot be replicated without significant effort.
NAKIVO Backup and Replicaion provides three different methods to back up Hyper-V VMs: image-based, application-aware, and incremental backup. Image-based backup backs up each VM individually, while application-aware backup replicates the state of a running VM. Incremental backup creates a delta snapshot of the current state of a VM. All three options provide complete protection against hardware failures, software crashes, power outages, and system corruption.
In addition, NAKIVO Backup&Replication supports site recovery, allowing you to easily recover a failed Hyper-V environment within minutes. You can use either the same or another server to continue operations immediately after recovering from a disaster.
RECOMMENATION: Click here for help with Windows errors.
Frequently Asked Questions
What’s the Best Virtual Machine?
Microsoft announced a major update to virtualization technology called Hyper-V in January 2018. While some people were excited about the potential, others weren’t sure how much value the new features really added. There are plenty of options out there for running virtual machines, including VMware Workstation, Parallels, VMWare Fusion, Oracle VM Server, and even Linux distributions such as Ubuntu and Debian.
The problem with choosing one over another is that each offers different capabilities. For example, you might want to run multiple operating systems simultaneously, or use a particular version of Windows without having to install it yourself. You could also choose something that integrates better with existing software or hardware.
There are pros and cons to every option, and we’ve rounded up our favorite tools here. We tested each product against several criteria, including ease of installation, compatibility with older versions of Windows, performance, and price.
Ease of Installation
This is probably the most important factor when deciding what virtual machine software to use. Some products require a lot of manual setup, while others come preconfigured and ready to go. In general, the easier it is to set up a virtual machine, the less likely you are to encounter problems down the road. This includes things like installing drivers, configuring network settings, and setting up disk partitions.
We found that VMware Workstation and VirtualBox both had relatively easy setups. Both required minimal configuration and worked well with existing hardware. However, neither product integrated well with Windows 10. VMware Workstation requires a separate download of Windows 10 Pro, while VirtualBox needs to be installed separately.
VirtualBox is free, but it lacks some key features, including support for USB devices and networking.
How to Load Your Virtual Machine
The process of loading a virtual machine is quite simple. You just need to connect it to the network and save the current state of the virtual machine. Let’s take a look at how to do this.
Step 1: Open the Hyper-V manager.
Step 2: Locate the virtual machine you want and click on it.
Step 3: Click on the Connect button.
Step 4: If there are no errors, you’ll see the following screen:
Step 5: Select Yes and continue.
Step 6: Wait while the system loads the virtual machine.