- Download and install the software.
- It will scan your computer for problems.
- The tool will then fix the issues that were found.
0x8024a105 is one of the most common errors that occur during the installation process of Microsoft Windows. This error usually happens due to problems with the hard disk space. In some cases, it might happen because of malware infection. If you are facing this error while updating Windows 10, then follow the given steps to fix it.
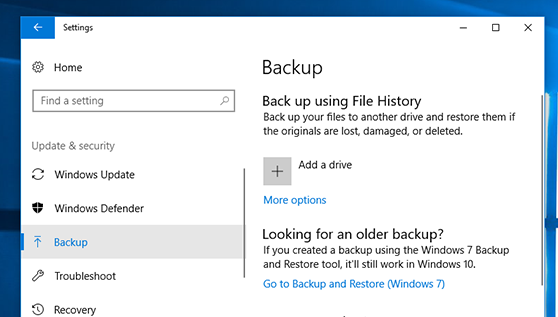
1. Create a backup of your files
2. Clean your registry
3. Repair your system
4. Remove unwanted software
5. Reinstall Windows
6. Run System Restore
7. Change your PC settings
Fix 2. Check Your Internet Connection
Microsoft released Windows 10 October 2018 Update KB4484763 on October 17, 2018. This update includes some improvements to the Windows Update system. If you are experiencing problems installing the update, try switching between different types of networks or cables. You might find one that works better.
If none of those work, check your internet connection. Is it working correctly? Does it use the same type of connection as what you used to download the update? Are there any errors on the screen?
Fix 3. Reset Software Distribution Folder
To reset the Software Distribution folder we must run the following command in the command prompt. Don’t forget to select the entire folder before you delete it.
Type the following command in the Windows command prompt:
cd \SoftwareDistribution\Microsoft\Windows\CurrentVersion\Uninstall
del /q *.*
This command removes everything inside the folder. If you want to remove just one file, use the del command like this:
del /q *.exe
Delete the whole contents of the software distribution folder
Type the following command:
rd /s /q “C:\Program Files\Common Files\microsoft shared\Web Server Extensions\16\”
Restart your computer and see whether the issue still persists.
If the problem persists, try Solution 4.
Updated: July 2025
We highly recommend that you use this tool for your error. Furthermore, this tool detects and removes common computer errors, protects you from loss of files, malware, and hardware failures, and optimizes your device for maximum performance. This software will help you fix your PC problems and prevent others from happening again:
- Step 1 : Install PC Repair & Optimizer Tool (Windows 11, 10, 8, 7, XP, Vista).
- Step 2 : Click Start Scan to find out what issues are causing PC problems.
- Step 3 : Click on Repair All to correct all issues.

Fix 4. Run the DISM Tool
DISM stands for Disk Management. If you’re running Windows 10, it’s built into the operating system. When you open DISM, you’ll see a list of hard drives and partitions on your computer. Click on one of those items and select “Repair”.
If you don’t know what problem you’re trying to fix, here are some common issues that DISM can help resolve:
– Your PC won’t start up properly.
– A program doesn’t work correctly.
– An error appears during installation.
– Error messages pop up while installing software.
– Files aren’t being deleted properly.
Fix 5. Perform a Clean Boot
A clean boot can help you figure out what’s causing your computer to slow down over time. If it’s a software issue, you can simply uninstall programs one by one and see how your system performs. If it’ s a hardware issue, you might want to try replacing some parts, such as memory modules or hard drives.
To perform a clean boot, follow these steps:
1. Shut off your computer.
2. Restart your computer while pressing F12 repeatedly. This key combination brings up a menu where you can select Advanced Startup Options.
3. Clear the checkbox next to Automatically restart.
4. Select OK. Your computer restarts normally.
Fix 6. Reset the Catroot2 folder
If you’re having trouble getting rid of the error “The system cannot find the path specified.” then try resetting the catroot2 folder. If you’ve tried everything else and still haven’t fixed it, here’s how to do it.
1. When the Command Prompt opens, press Enter.
2. Type the following command exactly as shown:
3. Press Enter again.
4. Type the following command:
Fix 7. Reinstall Windows 10 to the Latest Version
The final solution is to reinstate Windows to the latest version of Windows 10. This way you won’t lose anything important. You’ll just have to restore your data from backups. If you don’t want to do it manually, use a professional disk cloning software.
Free Disk Cloning Software can be used to back up the system disk.
MiniTool Partition Wizard Free Edition is an easy way to copy entire hard drives, make bootable backups, create images, recover deleted partitions, fix damaged disks, shrink partition sizes, etc. This software allows you to easily restore data from the original disk to another one.
You can use it to quickly create a complete backup of your Windows operating system including programs, documents, settings, drivers, applications, personal information, etc. You can even make a full backup of your entire PC.
The software supports both FAT32 and NTFS file systems.
Features:
* Create Bootable ISO Image Files
* Copy Entire Hard Drive
* Make Full Backups
Reinstall Windows 10
Windows 10 is a great operating system. However, it does come with some problems. One of those problems is that sometimes, Windows Update fails to update Windows 10 properly. This error code 0x8024a0f5 appears on the screen and causes many issues including freezing or crashing the computer. In addition, there are no known solutions for this issue.
However, Microsoft knows about this problem and they have a solution for it. They call it “reinstallation”. So, what exactly does “reinstallation” mean? Well, it simply means that you must backup your system disk and wipe everything clean. Then, you can re-install Windows 10 without having to worry about installing the latest version of Windows 10.
In fact, we have written a detailed tutorial on how to do this step-by-step. We hope that you find it useful.
How To Install Windows 10 After Wiping Your System Disk
Step 1 – Backup Your System Disk
First things first, you need to make sure that you have backed up your system disk. There are several ways to do this. For example, you can use WinRAR to compress all files on your hard drive into one archive file. Or, you can use EaseUS Todo Backup to create a compressed image of your entire hard drive.
If you don’t know how to do this, please refer to our previous article titled “Back Up Your Computer Using EASEUS Todo Backup.”
RECOMMENATION: Click here for help with Windows errors.
Frequently Asked Questions
How long does it take for Windows 10 to install?
Depending on your PC specifications, it takes about 30 minutes. Your PC must meet the following requirements to complete installation within 30 minutes:
– A processor speed of 2 GHz or faster
– At least 4 GB RAM
– At least 20 GB free space on your hard drive
Can I use my current version of Windows 7 or 8.1 during the upgrade process?
Yes, you can continue using your existing operating system during the upgrade process. However, we recommend that you backup your important documents before starting the upgrade process.