- Download and install the software.
- It will scan your computer for problems.
- The tool will then fix the issues that were found.
The first method uses Windows 10 update assistant to download and install Windows 10 21H2 update. This article explains how to use Windows 10 update assistant to install Windows 10 21H1 and 21H2 updates. For those who are interested in installing Windows 10 21H2 directly, you can follow the steps mentioned here.
Step 2: Click on “Check now”. You’ll see a notification saying there are some important updates. Select “Install Updates”.
Step 3: After installation completes, restart your PC.
Right-click it and select Uninstall. Step 5: Restart your computer.
There you’ll find option called “Downloaded updates”. If you don’t see it, check whether you’ve updated Windows 10 recently.
How to Use Update Assistant to Manually Download and Install the Windows 10 21H2 Update
Microsoft has released a new build of Windows 10, version 20H1, aka “Windows 10 October 2018 Update.” While it’s still being rolled out, Microsoft has already pushed the update to Insiders in the Fast ring, meaning that most people should already have received the update. However, some users are reporting that they’re getting errors during the installation process, specifically related to the amount of free space on their systems. If you want to download and install the latest Windows 10 build yourself, here’s what you need to do.
Step 2: Click Change button next to Available size.
Step 3: Select Delete files older than X days.
Step 4: Choose the number of days you want to keep old files and press OK.
Step 5: Press Yes to confirm that you want to delete the selected items.
Step 6: Wait while the operation completes.
How to Determine How Much Free Space Is Left on Your Windows 10 Install Drive
First of all, you need to determine the drive Windows 10 is installed on your computer. To do this, enter “%SystemDrive%” in the Windows 10 search bar. Then, click “Properties.” You’ll see a list of drives. Select the one labeled “System Reserved,” and look at the total free space there. If it says 0 bytes, then Windows isn’t installed on that drive. If it says something else, then go ahead and proceed to step 2.
If you don’t know where Windows 10 is installed, try searching for “%WindowsDir%. This will show you where Windows 10 is installed.
Updated: June 2025
We highly recommend that you use this tool for your error. Furthermore, this tool detects and removes common computer errors, protects you from loss of files, malware, and hardware failures, and optimizes your device for maximum performance. This software will help you fix your PC problems and prevent others from happening again:
- Step 1 : Install PC Repair & Optimizer Tool (Windows 11, 10, 8, 7, XP, Vista).
- Step 2 : Click Start Scan to find out what issues are causing PC problems.
- Step 3 : Click on Repair All to correct all issues.

How To Download And Install The Most Recent Windows 10 Update Manually
Microsoft has announced that the latest version of Windows 10 will be automatically downloaded and installed when people sign into their PCs. This is a change from previous versions where the operating system had to be manually downloaded and installed. The reason behind this change is simple; Microsoft wants to make sure that everyone gets the latest security patches.
The good news is that you can still control whether or not you want to install the update. Here are some steps to follow if you decide to go ahead and install the update yourself.
1. 2. Click Check For Updates.
3. Wait for the process to complete.
4. When prompted, select “Install Now.”
5. Follow the instructions to finish installing the update.
How To Download And Install The Windows 10 21H2 Update Manually From Microsoft’s Update Catalog
Microsoft recently pushed out the latest Windows 10 build, version 21H2. If you’re running Windows 10 Pro, Enterprise, Education, Mobile, or Server edition, you’ll receive the update automatically. However, if you’re running one of those editions without automatic updating enabled, you’ll need to download it yourself. In this article we show you how to do just that.
You’ll see a list of all the current versions of Windows 10, along with the date each build was released. Clicking on the Build number will take you directly to the Windows Store where you can download the build.
If you don’t want to wait for the next Windows 10 build to roll out, you can manually download the latest version of Windows 10 from Microsoft’s servers. Here are the steps to follow:
Step 2: Select the option labeled “Download Windows 10.”
Step 3: Scroll down to the bottom of the page and select the link titled “Windows 10 Home.”
Step 4: Follow the instructions to complete the installation process.
Note: If you’re installing Windows 10 on a PC that already has Windows 10 installed, you won’t be prompted to upgrade. Instead, you’ll simply be asked whether you’d like to keep both operating systems or replace one with the other.
Check Your Windows 10 PC’s Processor Architecture
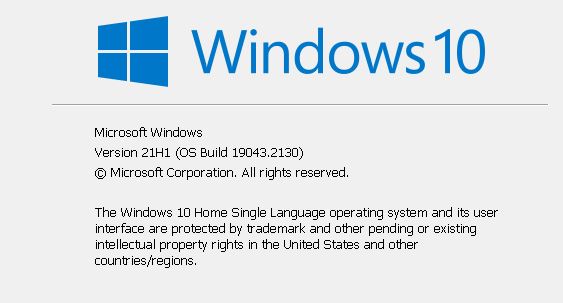
To check your processor architecture, enter winver into the command prompt. You’ll see something like this:
Microsoft Windows
(c) 2018 Microsoft Corporation. All rights reserved.
If it says “x86”, you’re running 32-bit version of Windows 10. If it says “x64”, you’re running 64-bit version.
You can use this information to determine whether you need to do anything special to run the latest Windows 10 update.
For example, if you’re running the x64 version of Windows 10 and are planning to upgrade to the Creators Update, you might want to make sure you have enough RAM installed.
In addition to the usual memory requirements, the Creators Update requires 4GB of RAM. So if you don’t already have 4GB installed, you’ll probably need to add another 2GB or 3GB of RAM.
Manually Download And Install Windows 10 21H2 Update
Microsoft announced today that it had pushed out the second major patch for Windows 10 version 20H2. This one includes fixes for issues that cropped up after installing the first patch. You can manually download and install the new update now.
The second patch addresses a bug that caused some PCs to reboot randomly after updating to the previous version of Windows 10. In addition, there are several improvements to the way Windows handles power management, including better support for hybrid devices.
You can find the full list of changes here. If you want to learn how to do a clean install of Windows 10, check out our guide on that topic.
If you’re running the current build of Windows 10, you’ll need to wait for the next scheduled release before you can upgrade to the new version. Microsoft plans to push out the final version of Windows 10 version 21H2 sometime around May 2020.
RECOMMENATION: Click here for help with Windows errors.
Frequently Asked Questions
Windows 10 version 21H2 is now being rolled out to Windows Insiders. This build includes some bug fixes and improvements, along with some features. If you’re looking forward to getting it installed on your device, here’s how to do it manually.
The process of downloading and installing the latest Windows 10 build is pretty simple. You’ll just need to follow our step-by-step guide. But there are certain things you must keep in mind while doing so. So let’s dive into it.
How To Download Windows 10 Build 2190 On Your PC
You can download the latest Windows 10 build directly from Microsoft’s servers. Once you’ve done that, select “Check Now.” You’ll see a pop-up window saying that the system needs to restart. Click OK to confirm. When the system restarts, you’ll find a notification about the latest Windows 10 build. Just tap on it to start the installation process.
How To Install Windows 10 Build 2190 Using Windows Store
If you don’t want to go through the hassle of downloading the latest Windows 10 build yourself, you can use the Windows Store app to do so. First, open up the Windows Store app on your phone or tablet. Then, tap on the hamburger menu icon at the bottom left corner of the screen. Select Settings. Scroll down to the bottom of the settings list and tap on Change PC settings. Here, scroll down to the section titled Update and security. Tap on the option named Get updates automatically and set it to either Always check online or Never check online. Finally, tap on Save changes.