- Download and install the software.
- It will scan your computer for problems.
- The tool will then fix the issues that were found.
Microsoft is having some issues with their Windows 10 update servers, causing many people to receive the following error code: 0x8007054E. If you’re one of those affected, it might be helpful to know what causes this error code, and how to fix it.
The most common cause of this error is due to a corrupted.msu file. When you try to install a patch, the installer tries to download the latest version of the.msu file. However, since the server isn’t working properly, the installer fails to do so. As a result, the installer stops trying to download the.msu file and displays the error code mentioned above.
You can check whether you have a corrupt.msu file by opening up %windir%\System32\Drivers\wuauserv.inf_amd64.xml in Notepad and looking for the string “0x8007054e”. If you find this string, delete the entire contents of the file and save it again. You’ll see that the error code disappears.
If you still experience the error code after deleting the.xml file, open up %windir%/Temp/WUAUX.tmp in Notepad and look for the string “0xc0000005”. If you find this, delete the entire contents and save it again.
Once you’ve deleted both files, restart your PC and try installing another patch. Hopefully, this will solve the issue.
What is Error 0x8007054f?
Error 0x8007054F is one of the most common errors encountered while working with Windows operating system. If you face such type of error, it is advisable to try some troubleshooting methods to resolve the issue. You might want to check the following steps to solve the problem:
1. Check the System Restore Point
2. Run Disk Cleanup tool
3. Remove temporary files
4. Restart your computer
5. Reset Network Adapter settings
6. Repair registry
Windows Update Error 0x8007054F
Microsoft is releasing a patch for Windows 10 version 1903. This update fixes several issues including error code 8007054f. If you are facing same issue, follow our step by step guide to fix it.
Step 1 : Open Control Panel
Step 2 : Click on System and Security option
Step 3 : Select Windows Update under Settings section
Step 4 : Now select View installed Updates button
Step 5 : You will see list of all updates installed on your system
Step 6 : Choose any one update and click on Uninstall button
Step 7 : After uninstalling, open windows update again and install latest update
Step 8 : Restart PC and check whether problem still exists or no
If you face any issue while following above steps, let me know via comments.
Updated: July 2025
We highly recommend that you use this tool for your error. Furthermore, this tool detects and removes common computer errors, protects you from loss of files, malware, and hardware failures, and optimizes your device for maximum performance. This software will help you fix your PC problems and prevent others from happening again:
- Step 1 : Install PC Repair & Optimizer Tool (Windows 11, 10, 8, 7, XP, Vista).
- Step 2 : Click Start Scan to find out what issues are causing PC problems.
- Step 3 : Click on Repair All to correct all issues.

1] Run Windows Update Troubleshooter
Microsoft recommends running Windows Update Troubleshooters to fix problems related to installing software and drivers. This troubleshooting tool scans your PC for issues and fixes them automatically. 2] Delete “C:\ProgramData\Package Cache” folder
If you are experiencing slow performance while opening programs, launching apps, or even just surfing the web, it could be because of unused files left behind by previous applications. If you want to free up space, delete the following folders:
%AppData%\LocalLow\Packages\*
%AppData%\Roaming\Microsoft\Windows\Uninstall
3] Clear cache and cookies
Then select Cookies and check Delete items manually. Click OK. Repeat steps above for Temporary Files and History.
2] Reset Software Distribution and catroot2 folders
SoftwareDistribution is where temporary data is stored. This includes cache files, cookies, history, passwords, etc. If you delete all the files and folders inside it, you’ll lose some of your information. You don’t want that. In Windows 10, there is a folder called “SoftwareDistribution”. All the temporary files are stored here. Also known as the temp folder, this folder stores everything such as cache, cookies, history, downloads, passwords, etc. Sometimes, apps fail to install properly because of corruption in this folder. So, we must clear out this folder and try again. Here’s how to do it.
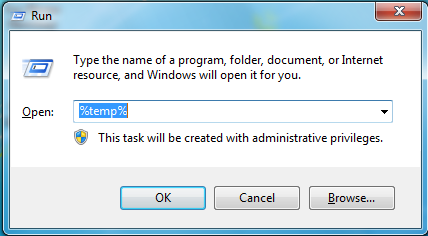
1. Click Start menu and type “reset”, press Enter.
2. A window will pop up. Select “Reset settings”.
3. Wait for resetting process to complete. After completion, restart your computer.
4. 5. Go to Disk Cleanup under Storage section.
6. Mark the checkbox next to “Temporary Files and Folders” and hit OK.
4] Check Windows Update Services
If you’re running Windows 10, it’s important to keep it up to date. Microsoft releases monthly security patches and fixes for bugs and issues. If you don’t install those updates, you could end up being vulnerable to attacks. This article explains how to check whether your system is updated.
5] Run SFC and DISM
To repair corrupted Windows registry entries, you must run the following command prompt command.
This command scans the entire computer for errors and repairs any problems it finds.
If you are unable to install programs, access documents, view pictures, or play videos, running this command might help.
For example, if you cannot open Microsoft Office 2016, try installing it again. If you still experience issues, use the command prompt to scan and repair the registry.
You can also run the command prompt while logged into Safe Mode. You can do this by pressing F8 during startup.
When prompted, select Safe Mode and press Enter.
7] Run Windows Update in Clean Boot
In recent versions of Microsoft Windows operating systems, it is possible to perform a clean boot without installing any software. This allows you to run Windows Update while keeping your system free of malware. However, some third party applications interfere with Windows Update during a clean boot, preventing it from installing security fixes. You can use the following steps to resolve this issue:
1. 2. In the Startup and Recovery section, select Show hidden settings.
3. Under the Boot tab, disable Automatic Restart.
4. Press OK to save changes.
5. Close all open windows and restart the computer.
6. Enter BIOS Setup and set Secure Boot to Disabled.
RECOMMENATION: Click here for help with Windows errors.
Frequently Asked Questions
Do I Really Need to Upgrade My Operating System?
Yes! To use programs like Word or Photoshop on your computer, you’ll need an operating system (OS). If you do not upgrade your operating system, your computer will eventually stop working correctly.
Will I be affected by security flaws if I do not upgrade my operating system?
Yes! It is critical that you constantly upgrade your operating system (OS). You should also monitor Microsoft and Apple security patches. These are the two firms that create the vast bulk of software used today.