- Download and install the software.
- It will scan your computer for problems.
- The tool will then fix the issues that were found.
To fix Windows Defender Error 8007042E, you must uninstall Microsoft Safety Essentials before trying to re-install it. If you are getting error code 0x80070426 while running Windows Defender.
Solution 1: Perform an SFC Scan
If you are experiencing problems during the upgrade process, there could be a number of reasons why it might fail. One common reason is that the system does not meet the requirements for running Windows 10 version 1803. If that happens, you should try one of the following solutions:
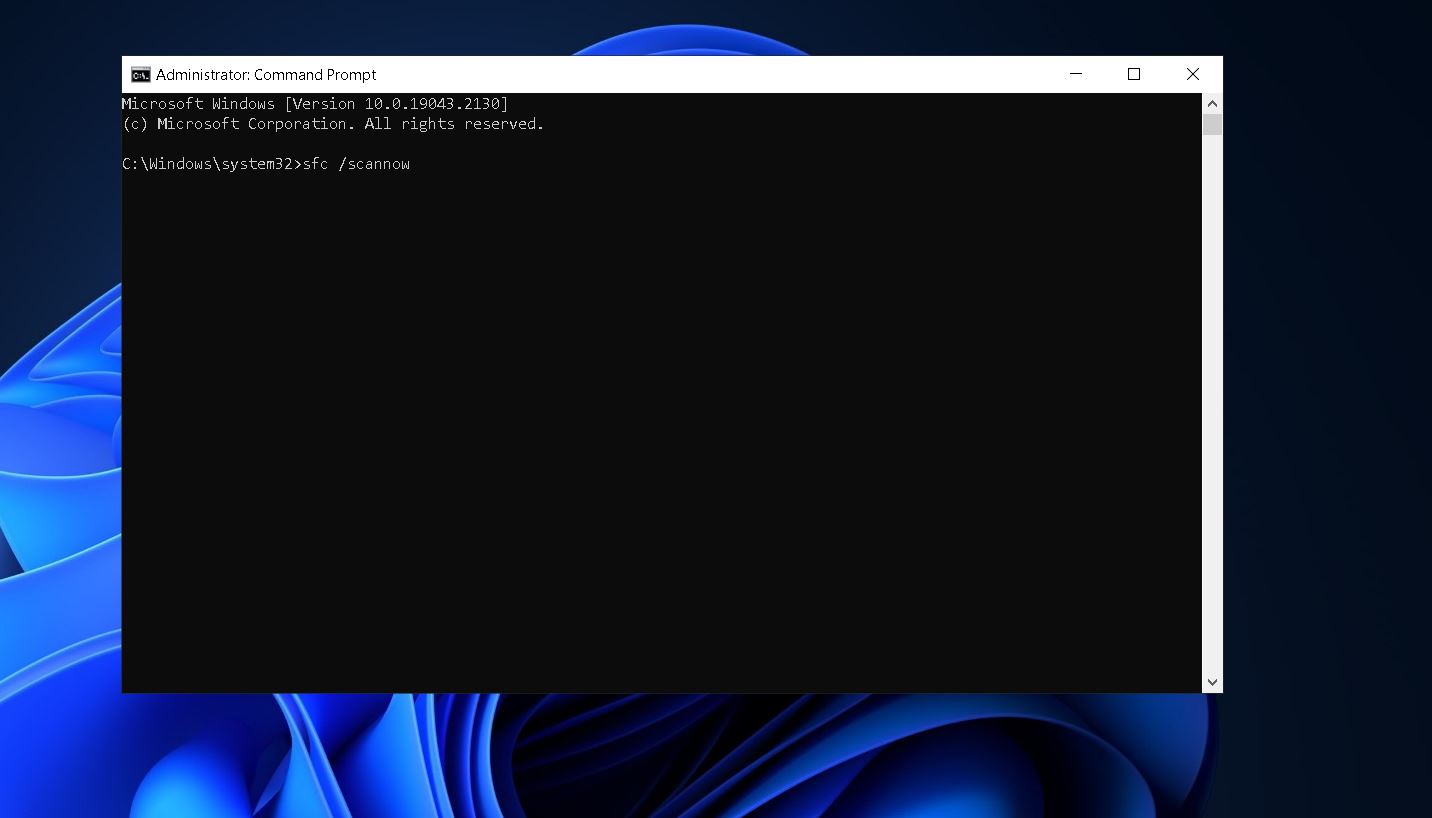
1. Run System File Checker (SFC). You can do this manually or automatically. For manual mode, follow these steps:
a. Type sfc /scannow in the command prompt window and press Enter.
b. Wait while the computer scans and checks files on your hard disk. When finished, type exit to close the command prompt window.
c. Restart the computer.
d. Log in again and check whether the issue still persists.
Solution 2: Inspecting for software conflicts
To check whether or not there is a conflict with your hardware, go into the BIOS settings. If you find a problem with the motherboard, you’ll need to replace it. You might want to try updating the firmware, too.
If you don’t know how to do this, you’ll need to contact the manufacturer of your motherboard.
The next step is to check if there is a conflict with any programs running in the background. This is usually done by disabling all startup programs.
You can open the Start menu and select “Control Panel.” From here, you can access the System Configuration window. Click on “Startup Programs,” and look for anything that looks suspicious.
Uninstall any programs that you don’t use often.
Next, you’ll need to reboot your PC. Once again, you can open the Start menu, select Control Panel, and open the Startup tab. Disable any programs that you no longer use.
Finally, you’ll need to restart your computer.
Protect PC from Threats with Anti-Malware
Auslogics Anti Malware scans your computer for viruses and spyware every day. We keep you safe online and help protect your privacy. You can trust us because we are trusted by millions of people around the world.
Download our free app now and scan your PC for threats like ransomware, Trojans, rootkits, key loggers, worms, adware, dialers, spyware, and many others.
If it finds anything suspicious, we’ll show you what to do next. If nothing is found, we’ll let you know how to make sure your PC stays clean.
We offer a 30-day money-back guarantee.
STORY: “Get Rid Of Ransomware With Auslogics Anti-Malware” Download Free Trial Now
Ransomware attacks are becoming increasingly common. They’re fast spreading and hard to detect.
Updated: July 2025
We highly recommend that you use this tool for your error. Furthermore, this tool detects and removes common computer errors, protects you from loss of files, malware, and hardware failures, and optimizes your device for maximum performance. This software will help you fix your PC problems and prevent others from happening again:
- Step 1 : Install PC Repair & Optimizer Tool (Windows 11, 10, 8, 7, XP, Vista).
- Step 2 : Click Start Scan to find out what issues are causing PC problems.
- Step 3 : Click on Repair All to correct all issues.

Solution 3: Windows Update Troubleshooter being used
The Windows Update Troubleshooting Tool allows you to run troubleshooting steps against specific problems. You can use it to find solutions to common issues like “Windows cannot update because of a recent system change.”
If you’re experiencing the 0x80070426 error, there are some things you can do to resolve it. If you’ve tried those steps already, here are three additional suggestions.
1. Run the Windows Update Troubleshopper tool
2. Reset your computer
3. Try updating again
Solution 4: The Windows Update Components are reset
If you are seeing this error, it probably means that there is something wrong with one of the components of Windows Update. To find out what component is causing the problem, follow these steps:
Step 2: Select the Advanced tab.
Step 3: Scroll down to select the “Windows Update” category.
Step 4: On the left side of the window, scroll down to the “Reset options” section.
Step 5: Check the box next to “Reinstall previous version of selected components”.
Step 6: Press OK.
Solution 5: Setting the Windows Update Services to Start Automatically
Windows 10 includes many useful features like Cortana, OneDrive, etc., but it also includes some annoying ones too. For example, there are certain settings that you can change manually, but most of them require manual intervention. If you want to make sure that everything works fine on your system, you must set the Windows Update Service to start automatically. In this article, we will show how to do that.
Step 1: Open Control Panel.
Step 3: Select Change Settings under Action center.
Step 4: On the left pane, select Automatic Updates.
Step 5: Set the setting to On.
Step 6: Restart your computer.
That’s it! Now your computer will automatically download and install updates without any issues.
Solution 6: Updating Your Device Drivers
There can be conflicts during the upgrade process if you are using an older version of Windows 10. If you want to avoid such problems, it is recommended to use the latest version of Windows 10. You can download the latest version of Windows here.
If you already have installed Microsoft Windows 10 Home Edition, Pro, Enterprise, Education, Mobile, Tablet, or Phone edition, you can easily upgrade to the latest version of Windows. Follow the steps below to complete the installation process.
Step 1: Download and Install Latest Version Of Windows 10
To begin the upgrade process, you must first download and install the latest version of Windows from the Microsoft Store. After downloading the latest version of Windows, launch the installer file located on your desktop.
Step 2: Choose Upgrade Option From Windows Update Or Create A New Installation
Once launched, select “Upgrade my copy of Windows” option to start the upgrade process. This will allow you to choose whether to perform an automatic upgrade or create a new installation.
Step 3: Select Language And Time Zone Settings
RECOMMENATION: Click here for help with Windows errors.
Frequently Asked Questions
How Often Should I Check For Updates?
You should check for updates at least once per week. If you are using an automatic update system (like Microsoft Update), then you should check for updates every day or two.
When Will I Receive My Free Windows Updates?
Your computer will automatically download updates for Windows 10 when you connect to the internet or start using your PC. You’ll receive an email notification if there are any pending updates available. If you don’t want to wait until then, you can manually check for updates at this link.