- Download and install the software.
- It will scan your computer for problems.
- The tool will then fix the issues that were found.
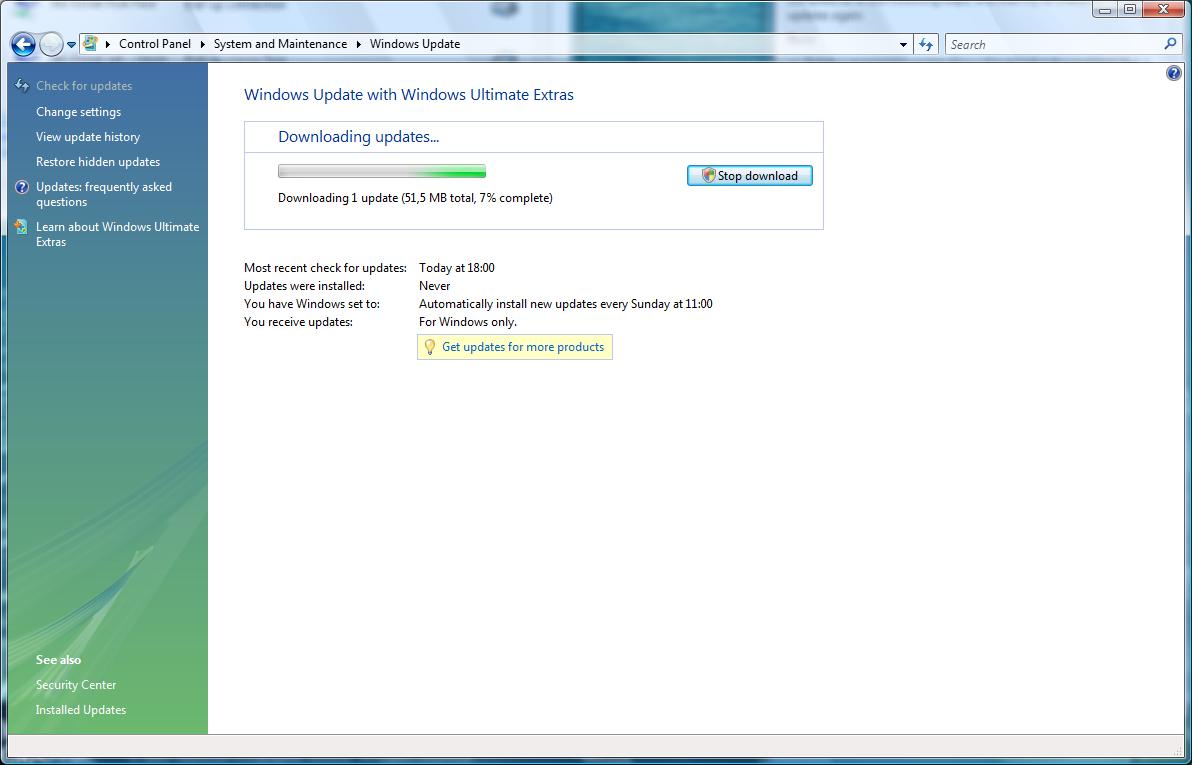
If you receive error code 80070490 or 80073712 while installing Service Pack 1 or any other installation of Windows Update, most likely your Windows system files are corrupted. Error code 80070490 is obtained when a user tries to install SP1 (manually or via Windows Update) on a Windows Vista (or Windows 7) computer, and during the installation received the error code: 0x80073712 from KB979306 received Windows Update on the same Computer.
After trying various suggestions found online, I was finally able to work around and fix errors 80070490 and 0x80073712 when installing Windows Update KB979306 and Windows SP1.
First, make sure you have installed all available drivers on your computer before proceeding to the solutions below. (Applies to clean installations only).
Here are some steps you can take to fix this Windows update error:
Contents
Run the System Update Readiness Tool
After running the System Update Readiness Tool, follow these steps.
Step 1. Download Windows Vista Service Pack 1 manually following Method 3 from the provided link.
Step 2: Put your computer in a clean boot state. It runs Windows Vista with a minimal set of drivers and startup programs and helps eliminate software conflicts.
The following link provides instructions for performing a clean boot: http://support.microsoft.com/kb/929135
Note. Make sure your computer is set to start normally by following step 7 in the Post Service Pack 1 article: How to fix the problem by performing a clean restart in Windows Vista or Windows 7: http: // support. microsoft.com/kb/929135
Step 3: Disconnect any unnecessary external devices from your computer.
Step 4: Install Service Pack 1 from the installation file that you downloaded from Step 1.
Disable pending updates
- Insert the recovery / installation DVD into your computer.
- Then boot from DVD. When you start your computer for the first time, the first screen you see should contain the shortcut you need to access the multiboot menu. In Dell, this is the F12 key, but it depends on the manufacturer. When you find it and find yourself in the multiboot menu, select “Boot from CD / DVD”.
- When prompted (after booting from CD / DVD), select Repair Your Computer and enter Command Prompt.
- Type C: (with colon) and press Enter.
- Then type cd c: \ windowswinsxs and press Enter.
- Type del pending.xml and press Enter.
- Reboot your computer
Updated: December 2024
We highly recommend that you use this tool for your error. Furthermore, this tool detects and removes common computer errors, protects you from loss of files, malware, and hardware failures, and optimizes your device for maximum performance. This software will help you fix your PC problems and prevent others from happening again:
- Step 1 : Install PC Repair & Optimizer Tool (Windows 11, 10, 8, 7, XP, Vista).
- Step 2 : Click Start Scan to find out what issues are causing PC problems.
- Step 3 : Click on Repair All to correct all issues.

Restore your computer
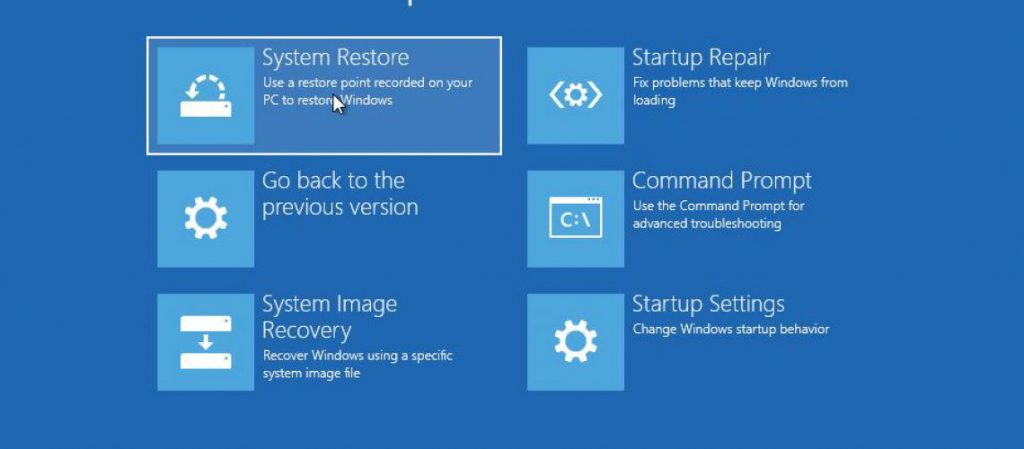
One of the most useful tools available to you is Windows System Restore. This is usually a great first step in troubleshooting a serious Windows problem.
- Open the control panel.
- In Control Panel, tap or click System and Security.
- In the System and Security window that opens, click or tap on System.
- Click or click the System Protection link on the left.
- In the System Properties window that appears, tap or click “Restore System …”. Button. If you don’t see it, make sure you are on the System Protection tab.
- In the System Restore window, tap or click Next> Restore system files and settings.
- Select a restore point to use from the list.
- After selecting the selected restore point, tap or click the Next> button.
- Confirm the restore point you want to use in the Confirm restore point window and tap or click Finish.
Make a Bootable Repair Disk to do a Startup Repair
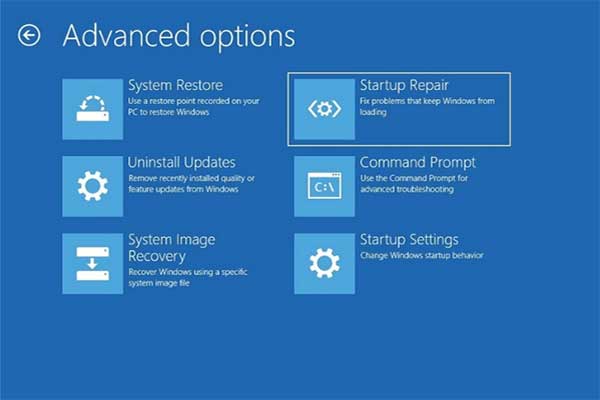
Download the ISO file from the link provided and create a bootable boot disk from it.
At startup, go to the Bios / Setup or Boot menu and change the boot order to boot the DVD / CD drive for the first time in that order. Then reboot with the hard drive on the disk.
At boot / power-up, the bottom of the screen should display F2 or DELETE to enter BIOS / Setup or F12 for the boot menu.
If you changed this, insert the created bootable hard drive into the drive and restart your computer.
RECOMMENATION: Click here for help with Windows errors.