
- Download and install the software.
- It will scan your computer for problems.
- The tool will then fix the issues that were found.
Outlook offers some fantastic features to make your email experience easier and faster. However, many users have various problems using Outlook. One such problem is that Outlook cannot access your personal data files.
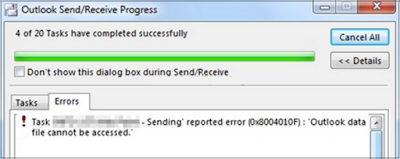
On a customer’s computer, the following error occurred during “Sending reported error (0x8004010F) : ‘Outlook data file cannot be accessed.’” The above error can occur if the Outlook profile is damaged or after transferring the Outlook PST file to another location on the hard drive or to another computer.
The exact error message should look like this:
0x8004010F: Outlook data file cannot be accessed.
When this error occurs, email cannot be sent or received, and Outlook continues to display the above error on the screen. This error is usually the result of a corrupt Outlook profile. There are several ways to work around this problem and get Outlook to recognize data files.
Change the Delivery Location of Outlook
Changing the Outlook delivery path can fix error 0x8004010F.
Follow these steps:
- Click the Start button, go to Control Panel and left click on Mail. Then go to Email Settings and click View Profiles.
- You need to select the current profile and click on the Properties -> Data Files tab.
- Now you need to write the name and path of the data file for your profile. It is used by default. Make sure you put a marker on it. Click on Close.
- If you still can’t access the Outlook data file using this method, go to the next method.
Repair Outlook Offline Data File (.ost)
Regardless of whether you’re using an Exchange, Office 365, or Outlook.com account, close the email app and follow these steps to troubleshoot an OST file:
Updated: July 2025
We highly recommend that you use this tool for your error. Furthermore, this tool detects and removes common computer errors, protects you from loss of files, malware, and hardware failures, and optimizes your device for maximum performance. This software will help you fix your PC problems and prevent others from happening again:
- Step 1 : Install PC Repair & Optimizer Tool (Windows 11, 10, 8, 7, XP, Vista).
- Step 2 : Click Start Scan to find out what issues are causing PC problems.
- Step 3 : Click on Repair All to correct all issues.

- Open the control panel.
- Quick Tip: If you are only using the default “Outlook” profile, you can enter this path: %LOCALAPPDATA%\Microsoft\Outlook to directly access the location of the OST file and go to step 12. Otherwise, continue with the following steps.
- Click User Accounts.
- Click the Mail option.
- In the “Email Setup” experiment, click the Show Profiles button.
- Select the profile with the account you want to correct. (The default profile is called “Outlook”.)
- Click the Properties button.
- Click the Email Account button.
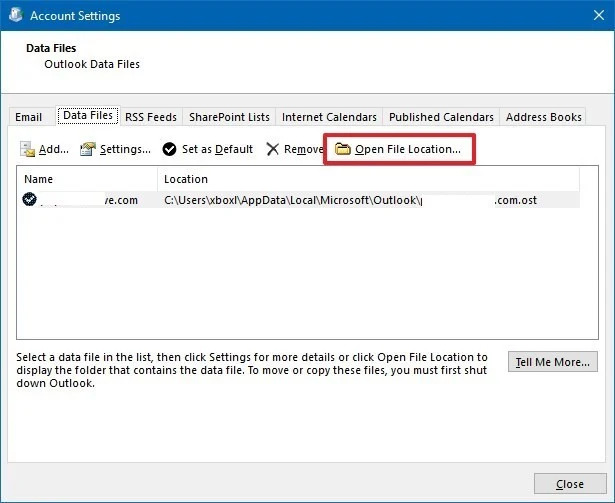
- Click the Data Files tab.
- Select the broken account.
- Click the Open File Location button.
- Click the button to close the Account Settings, Mail Setup, and Mail windows.
- Right-click the OST file of the account you’re having problems with and select Remove.
After completing these steps, reopen the desktop version of Outlook to restore the .ost file for the account that you want to restore.
Create a New Outlook Profile
If the reason for the error is a corrupt Outlook profile, creating a new profile will fix the error. To do this, find the current location of your standard Outlook data file (if the OST file) and create a new Outlook profile. Here are the steps:
Find the Default Outlook Data File
- Open the Control Panel and click Mail.
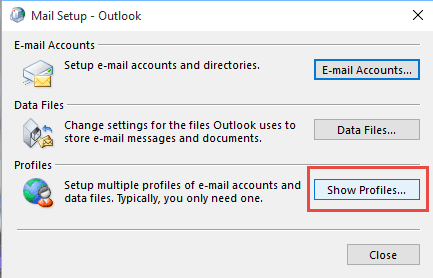
- The “Mail Setup – Outlook” dialog box appears. Click Show Profiles
- Select your current Outlook profile and click Properties
- The “Mail Setup – Outlook” dialog box appears again. Click Data Files
- The Account Settings dialog box appears. Click the Data Files tab and note the name and location of the default Outlook profile. The standard profile is indicated by a check mark.
- Close and leave.
Create a New Outlook Profile
Set up your IMAP or POP3 email account automatically:
- Open the control panel
- The “Mail Setup – Outlook” dialog box appears. Click Show Profiles
- Select your current Outlook profile and click Add
- In the New Profile dialog box, enter a name for the new profile and click OK
- The Add New Account dialog box appears. Enter your email information and click Next
- If the configuration is successful, click Finish.
RECOMMENATION: Click here for help with Windows errors.