Updated July 2025: Stop error messages and fix your computer problem with this tool. Get it now at this link
This issue occurs due to the synchronizing of data between multiple devices such as mobile phones, tablets, laptops, etc. If you use Windows 10, there might be some problems during the update process. In addition, we recommend checking out our article about how to resolve this issue.
Is SettingSyncHost.exe a virus?
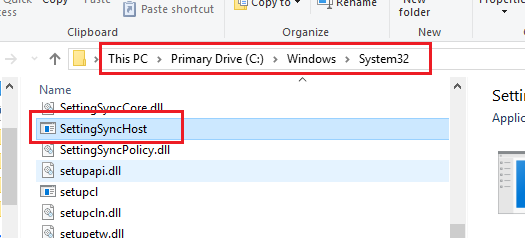
Cybercriminals might call their malicious software “SettingSyncHost.exe.” This file name is similar to legitimate programs like Settings Sync Host.exe. The original SettingSyncHost.exe files are located in the System 32 folder. Run a full system antivirus scan on the system if you find the suspicious process in another folder.
SettingSyncHost.exe high CPU usage
This issue occurs due to the Registry Settings which needs to be corrected manually. Restarting the Computer helps restore the Default Settings.
How to fix the error “Host Process for Setting Synchronization with High CPU Usage”
There is an issue with the hosting process for setting synchronization. This issue occurs when the host process for setting synchronization runs out of memory. As a result, it causes high CPU usage error. In such cases, you should check whether there is any update available or not. If there is no update, you can download the newest version of the host process.
If there is no update for the host process for settings synchronization, you can follow the steps mentioned below.
1. 2. Click Uninstall a program.
3. Select the host process for setting synchronized and press Next.
4. Press Install button to install the host process for setting the synchronization.
5. Restart your computer.
Method 1: Update Windows
If you’re having issues updating Windows 10, here’s how to fix it. There’s no way around the fact that Microsoft wants everyone to upgrade to Windows 10, but some people just don’t want to do it. Here’s how to force update Windows 10 without waiting for the monthly deadline.
Step 2: Click “Update & Security.”
Step 3: Scroll down to “Windows Update,” and make sure it says “Checked for updates.”
Step 4: Click “Advanced Options.”
Step 5: Select “Change settings that are currently unavailable.”
Step 6: Check “Automatically select the best network connection” and “Select my preferred language for non-Unicode programs.”
We highly recommend that you use this tool for your error. Furthermore, this tool detects and removes common computer errors, protects you from loss of files, malware, and hardware failures, and optimizes your device for maximum performance. This software will help you fix your PC problems and prevent others from happening again:
Updated: July 2025

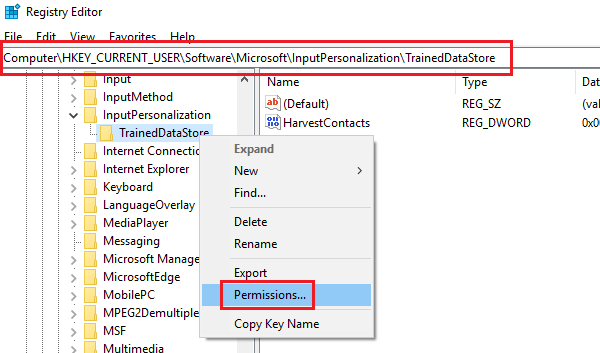
Method 2: Change who owns a Registry Key
When you make changes to the Windows Registry, it automatically creates a backup copy of the original data. If something goes wrong during the process, you might end up losing some information. This happens because the backup file is stored under a different name. You can solve this issue by adding ownership to the backup file.
To add ownership to the backup files, follow the steps below:
1. Type regedit into the box and press Enter.
2. In the left pane, locate the following keys: HKEY_LOCAL_MACHINE\SYSTEM\CurrentControlSet\Services\LanmanServer\Parameters
3. Name the value BackupFileName and enter the full path to the backup file. For example, c:\Windows\System32\ConfigBackup\Winlogon.bak.
4. Double-click the BackupFileName string value and type the owner account name. For example, MyDomain\MyUserAccount.
5. Close the Registry Editor window.
RECOMMENATION: Click here for help with Windows errors.
Frequently Asked Questions
How to check how GPU SettingSyncHost.exe is being used?
To check GPU Usage of Setting Sync Host.exe, follow these steps:
1. Click Start button and type task manager into the Search box.
2. Right-click on Task Manager and select Open from the menu.
3. In the Processes tab, locate SettingSyncHost.exe. Select it and press Ctrl+Shift+Esc keys simultaneously to open System Information dialog box.
4. Look for the Graphics processor section and see what percentage of CPU power is being used by the SettingSyncHost.exefile.
5. If the setting sync host is taking too much of your resources, you can disable/delete it.
6. You can use third party tools like CCleaner to delete unwanted files.
Why is the Host Process for Setting Synchronization running?
I noticed this morning for the fist time that Host Process for setting synchronization is running. After some research, I found out that it is used to update the Windows Registry. You will see a list of all the latest updates installed on your computer. Click the Details button next to each entry to view the information about the update. For example, here is the information about the update KB3129078. This update contains the following files:
C:\ProgramData\Microsoft\Windows\CurrentVersion\Uninstall\{E7A9F4C0-6BE5-4FE2-A1BA-B88CBFF7DDC5}\_uninst.msi
C:\ProgramData\Microsoft\Windows\WinRM\RpcClient\client.ini
C:\ProgramData\Microsoft\.NetFramework\v4..pdb