- Download and install the software.
- It will scan your computer for problems.
- The tool will then fix the issues that were found.
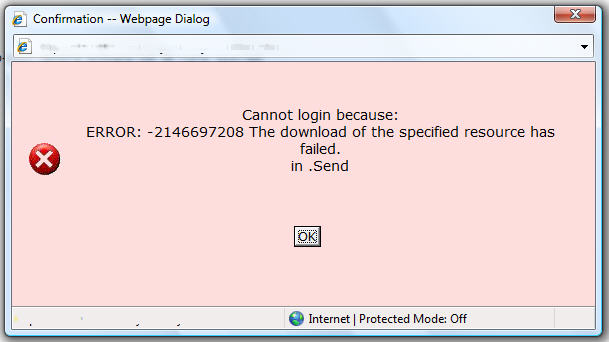
System error 2146697208, resource handling errors, and other critical errors can occur when the Windows operating system is damaged. The opening of the program is slowed down and the response time is delayed. Crashes and freezes can occur when launching multiple applications. There can be many reasons for this error, including excessive startup entries, registry errors, hardware / RAM leaks, fragmented files, unnecessary or redundant software installations, etc.
Here are some proven fixes that you can use to fix system error 2146697208.
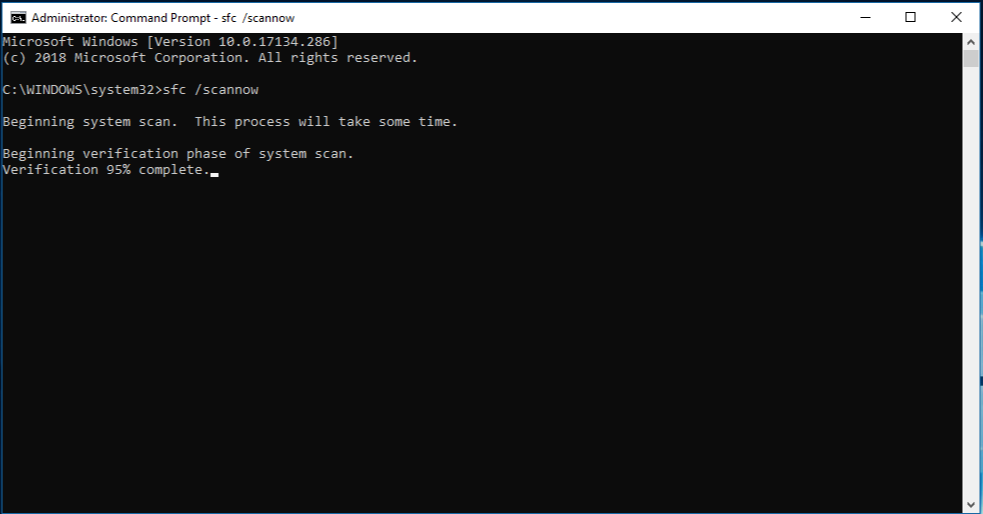
Perform an SFC Scan on your PC.
For advanced users, the following steps are used to troubleshoot system errors – error 2146697208 when manually handling resource issues.
SFC is the most useful way to recover corrupted Windows files. The whole process is very simple.
Run Windows 10 in secure mode with a network connection
The easiest way to boot in safe mode with network drivers is from the Windows 10 login screen. To access this screen, you can log out, reboot your computer or press Ctrl + Alt + Delete simultaneously.
- When you get to the Windows 10 login screen, you must hold down the Shift key on your keyboard and keep it pressed. Hold down the Shift key and press the power button (Windows 10 power button), then press “Restart””.
- When Windows 10 reboots, you will be presented with the option selection screen as shown below.
- Click the “Troubleshooting” button on the screen above to open the Troubleshooting Settings screen.
- Now click the “Advanced Settings” button on the screen above to open the “Advanced Settings” screen as shown below.
- On the above screen, select the “Launch Options” option. The Launch Settings screen will appear.
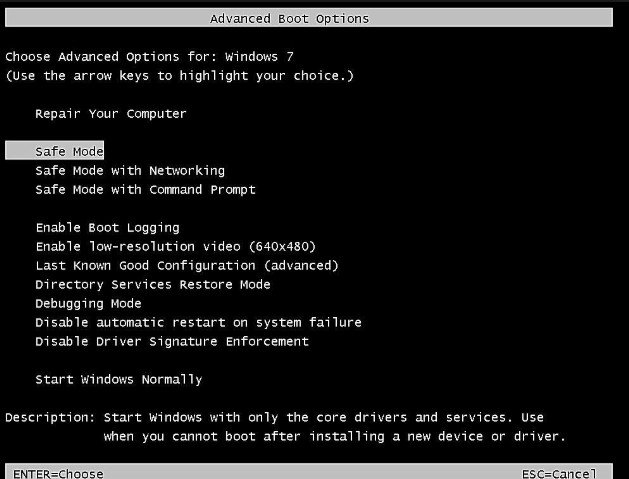
- Click the “Restart” button on the screen above. Now Windows will start, but you will see the screen shown below with several options you can choose to define how you want Windows to start.
- On this screen, you need to press the 5 key on your keyboard to enter safe mode with network drivers booting.
Now Windows 10 will start, and when you are done, you will see a prompt to login. In this prompt, you must enter your login password. After that your desktop will be displayed. However, this desktop will be marked with “Safe Mode” in each corner to indicate that you are in this mode.
Updated: July 2025
We highly recommend that you use this tool for your error. Furthermore, this tool detects and removes common computer errors, protects you from loss of files, malware, and hardware failures, and optimizes your device for maximum performance. This software will help you fix your PC problems and prevent others from happening again:
- Step 1 : Install PC Repair & Optimizer Tool (Windows 11, 10, 8, 7, XP, Vista).
- Step 2 : Click Start Scan to find out what issues are causing PC problems.
- Step 3 : Click on Repair All to correct all issues.

On this desktop, you can run programs and browsers and download files needed for troubleshooting.
When you are ready to restart in normal mode, you can reboot or shutdown your computer. The next time you start Windows, it will start in normal mode.
Perform a Clean Boot in Windows 10
Sign in to Windows with an account with administrator rights. Click Start> Run. Alternatively, if you do not have the Run command in the Start menu, you can press the R key on your keyboard while holding down the Windows key. In the “Run” dialog box that opens, type msconfig and press OK.
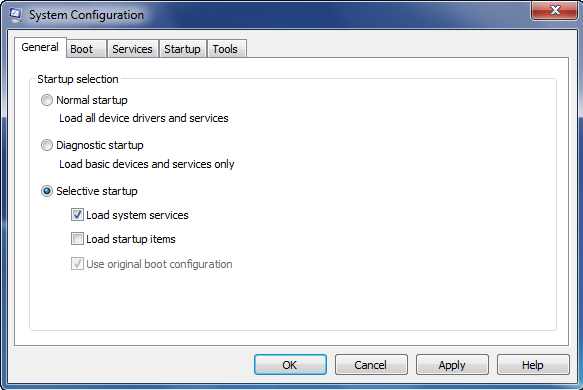
Now you should see the system configuration window. Click the Services tab.
On the Services tab, you will see a long list of services available on your PC. Someone controls them, others do not. The ones that do this will boot automatically the next time you start Windows. This next step is extremely important. So do not miss it.
First check the box Hide all Microsoft services. As the name implies, this will hide all Microsoft services from the list. Most, if not all, of these services are necessary for Windows to work properly.
Then click the button “Disable all”. By performing these two steps, you have actually disabled all third-party software development services. All Microsoft services are saved when you restart Windows and can be downloaded.
You should also click on the “AutoRestart” tab and disable all programs that you are running. Note that this tab is a bit more complicated because there is no way to separate the startup programs from third-party programs. So if you turn them all off, you can disable your WiFi card, Windows Protector, etc. E. However, later you can easily turn everything back on. So it is worth a try.
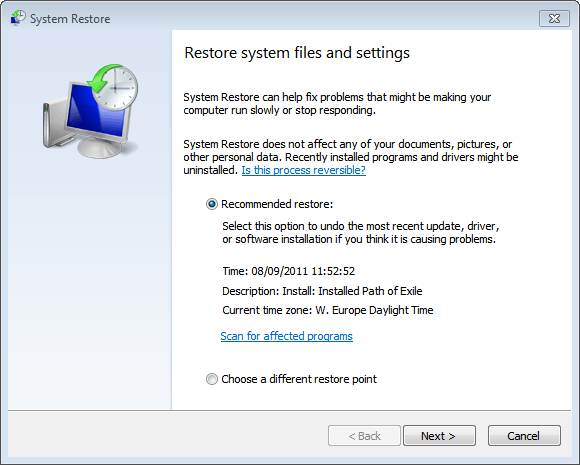
Use System Restore
- Press Windows Key + R to open the Run window.
- Enter msconfig and click OK.
- On the General tab, select Normal startup.
- Click on the Services tab.
- Uncheck Hide all Microsoft services.
- Click Activate All.
- Click on the “Home” tab.
- Click “Open Task Manager” and activate all your starters.
- Click on OK.
- Click on reboot.
- To configure Windows to use normal boot state, simply revert the changes.
RECOMMENATION: Click here for help with Windows errors.