- Download and install the software.
- It will scan your computer for problems.
- The tool will then fix the issues that were found.
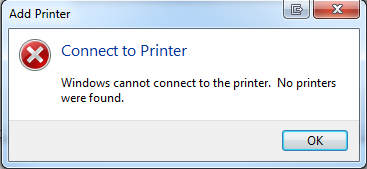
Error 0x00000bcb is a printer issue that some users have posted on the Microsoft forum. Some users encounter this error when trying to connect printers to local networks.
When these users try to add a shared network printer, they receive a “Connect to Printer” error message with code 0x00000bcb. Does this error message mean anything to you? If so, check these possible resolutions for error 0x00000bcb.
What is the cause of the printer error 0x00000bcb?
We investigated this specific issue by reviewing various user reports and testing various recovery strategies that other affected users have successfully used to sort out this issue. It turns out that this kind of problem occurs in different scenarios. Here is a short list of potential criminals who may be responsible for this problem:
- Printer queue defective
- Print Spooler Service with Errors
- Access control problems
- The wrong printer is asking you to do this
Run the printer troubleshooter
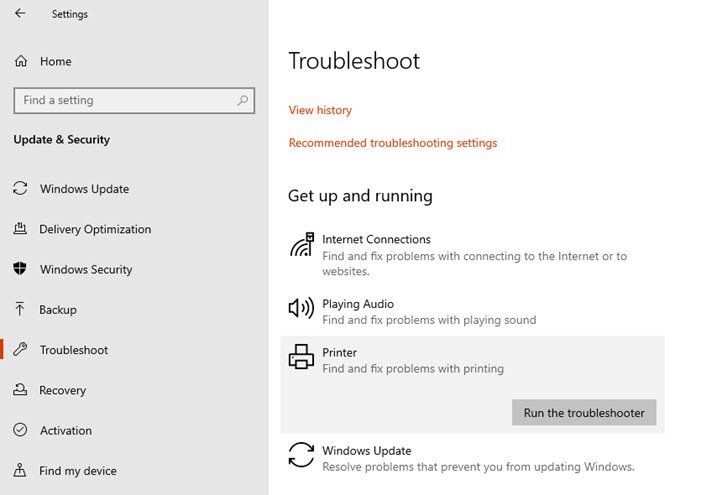
Before we dive into other, more targeted recovery strategies, let’s see if your operating system can’t fix the problem automatically. Several affected users have confirmed that they can repair 0x00000bcb indefinitely by running a built-in utility that can automatically resolve most printer-related issues through a number of predefined recovery strategies.
The Windows Printer Troubleshooter will analyze your current printer driver and dependencies before determining whether any of the recovery strategies apply to the nature of the current problem. Once you run this tool, it will check for inconsistencies and automatically apply the appropriate one.
Here is a quick guide to help you fix error 0x00000bcb using a printer troubleshooter app:
- Open the Run dialog box by pressing the Windows + R keys. Then type ms-settings: Troubleshoot and press Enter to open the Troubleshoot tab in the Settings app.
- After you click on the Troubleshoot tab, go to the right pane and scroll down to the Get & Run section. Once you’re there, click on Printer, then click on Run Troubleshoot to launch the troubleshooter utility.
- Once launched, the utility automatically scans all printer components to determine the problem. If a viable repair strategy is found, the fix will appear on the next screen. To apply this update, simply click Apply this update and wait for the recovery policy to apply.
- After applying the recovery policy, restart your computer and see if the problem is resolved on the next restart by trying to reconnect to the same network printer.
Reinstall the printer
First, make sure the printer is properly shared. Then follow these steps to install the printer.
Updated: July 2025
We highly recommend that you use this tool for your error. Furthermore, this tool detects and removes common computer errors, protects you from loss of files, malware, and hardware failures, and optimizes your device for maximum performance. This software will help you fix your PC problems and prevent others from happening again:
- Step 1 : Install PC Repair & Optimizer Tool (Windows 11, 10, 8, 7, XP, Vista).
- Step 2 : Click Start Scan to find out what issues are causing PC problems.
- Step 3 : Click on Repair All to correct all issues.

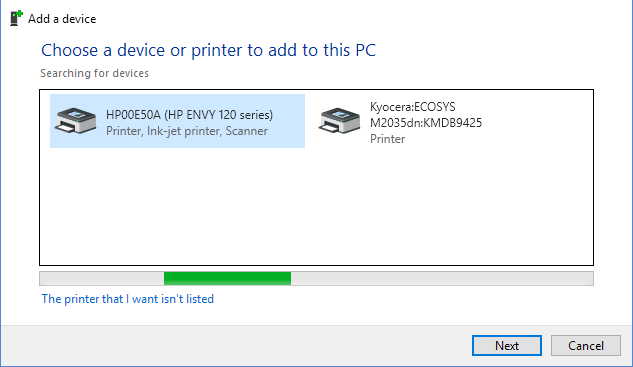
- Click Start, click Control Panel, and then double-click Devices and Printers.
- Click Add Printer.
- Select “Add a local printer”.
- Select “Create New Port”. Select “Local Port” as the port type.
- Enter the address in the Enter Port Name field in the following format.
\ [host IP address] \ [shared printer name]
Then click Next. - Follow the instructions to complete the installation. During installation, select the appropriate driver from the list of drivers.
Restart the print spooler service.
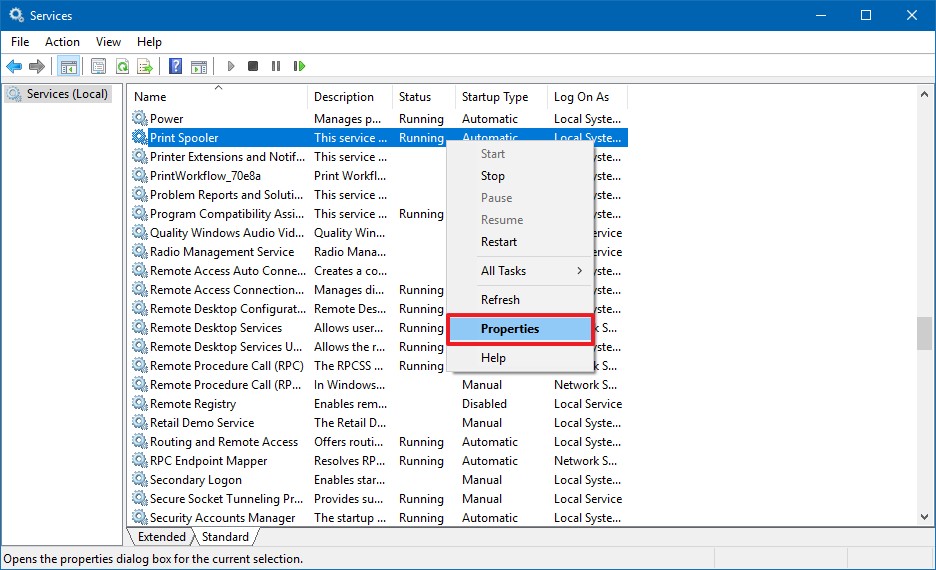
Follow these steps to stop and then restart the Print Spooler service.
- Press Win + R (Windows logo key and R key) at the same time. The Run dialog box will open.
- Enter services.msc in the run box and click OK.
- In the Name list, locate the Print Spot Service and double-click it.
- In the Service Status section, click the Stop button.
- Click the Start button to restart the service.
Adding a network printer as a local printer
- Click Start> Devices and Printers.
- At the top of the screen, click Add Printer.
- Select Add a local printer.
- Select Create New Port, then Standard TCP / IP Port.
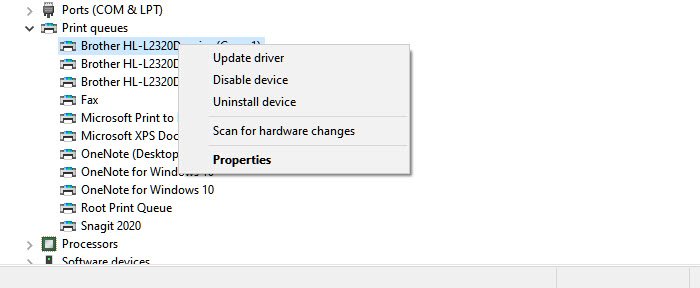
- Enter the IP address of the printer (You can find the IP address of your printer by right-clicking it on the control panel and selecting the Printer Properties and Ports tab.
- Select a driver from the list. (If you send data directly to the printer like I did, the driver doesn’t matter because it bypasses anyway.)
- Follow the instructions in the wizard to set the added printer as the default printer.
RECOMMENATION: Click here for help with Windows errors.