Updated July 2025: Stop error messages and fix your computer problem with this tool. Get it now at this link
WUDFHost.exe is a trusted system process running all kinds of drivers. This process usually uses a large amount of CPU resources. You might wonder what it does, why it needs such high amounts of resources, and how you can fix it. In this article we explain everything about WUDFHost. Exe and show you how to solve the problem.
1. Look for viruses and malware on your computer.
The number one way hackers gain access into your computer is via email attachments. If you receive an attachment from someone you don’t know, it’s best to delete it immediately. This is because even though you might think you’re deleting the file, there are still ways for hackers to recover it. You can use anti-virus software to scan the file, but make sure you download the latest version of the program. Hackers often release updated versions of viruses, so you’ll want to keep up with the times.
Another way hackers gain access to your computer is by clicking on a link in an email. When you do, you’re sending information over the internet to the person who sent the email. In some cases, this could lead to your computer being infected with malware. To prevent this from happening, always double check the URL of any site you plan to visit. If you suspect your computer has been hacked, contact your ISP and ask them to reset your password. They may also provide instructions on how to fix the problem yourself.
2. Don’t Open Attachments From Unknown Sources
Email attachments aren’t just used to send documents anymore. Many people now use them to attach pictures, videos, and music. While this makes things easier, it also opens up the possibility of getting a virus.
To avoid this, never open an attachment unless you know exactly where it came from. Before you open the file, look at the sender’s name and address. If you don’t recognize it, don’t open it. Instead, save it to your desktop and open it later.
3. Use Anti-Virus Software
2. Check for updated device drivers
Device drivers are essential software components that allow devices like printers, scanners, cameras, and phones to work properly. They’re often updated automatically by manufacturers, but you can check for updates yourself. If you find an update, download it immediately.
If you don’t want to go through the hassle of downloading and installing each driver manually, you can use our free tool to scan your computer for outdated drivers. Simply run the tool and let it do the hard work.
3. Check to see if the System File is broken.
The Windows operating system uses many different system files to keep everything running smoothly. When one of these files becomes corrupted, it causes problems like slow startup times, application crashes, and freezes. You can use the ScanDisk utility to check for corruption in system files, but you might want to try something easier.
Run SFC in Safe Mode
To run SFC in safe mode, boot into Safe Mode. To do this, restart your computer while pressing F8 during the initial boot process. Select Safe Mode from the list of options presented to you. If you don’t see Safe Mode listed, press Enter repeatedly until you reach the menu. Then select Safe Mode.
Use this tool to repair corrupt file systems
If you are unable to start Windows normally, you can use this tool to repair corrupted system files. Download the program, install it, and open it. Click Repair Disk to scan your hard disk for damaged system files.
4. Stop the Intel Wireless Gigabit User Mode Driver from working.
The following guide explains how to disable the Intel Wireless Gigabit Network Connection driver on Windows 10. If you are experiencing issues with Wi-Fi connectivity while browsing the web, it could be because of this driver. To fix the problem, follow the steps listed below.
1. 2. Right-click on the device named “Intel(R) WiFi Link 5100 AGN” and select Uninstall
3. In the window that appears, select Yes to confirm the uninstallation process.
4. Restart your computer.
5. 6. You should see Bing’s homepage without any ads.
7. Close the browser and restart your computer.
We highly recommend that you use this tool for your error. Furthermore, this tool detects and removes common computer errors, protects you from loss of files, malware, and hardware failures, and optimizes your device for maximum performance. This software will help you fix your PC problems and prevent others from happening again:
Updated: July 2025

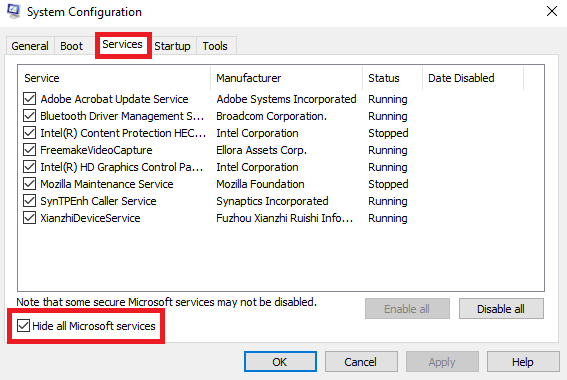
5. Perform a Clean Boot
If you are having issues with your Windows 10 PC, it could be because there are some programs installed on your system that aren’t necessary. These programs can slow down your computer, cause errors, and even prevent your device from working properly. If you want to make sure everything is running smoothly again, perform a clean boot to delete all the extra software. This process clears up space on your hard disk, allowing your operating system to run faster and smoother.
To do this, follow these steps:
1. Restart your computer.
2. When the screen appears, press and hold Shift key + F10 keys together. You’ll see a menu come up. Select Safe Mode.
3. Once inside safe mode, open Device Manager. Look for anything related to “Windows.” Uninstall whatever you find and reboot.
4. Disable those you don’t use. Reboot.
5. Type ‘ipconfig /flushdns’ without quotes and hit enter. Wait about 5 minutes and type ipconfig /renew. Hit enter.
6. Disable Any Portable Devices
If you are installing Windows 10 on a laptop or desktop computer, there is one small step you must take before beginning the installation process. If you do not disable any portable devices, you could experience some problems while setting up Windows 10. In fact, disabling portable devices is something you should do even if you plan to install Windows 7 or 8.1. Here’s how to do it.
Step 1. Step 2. Click on Troubleshoot.
Step 3. Select Advanced options.
Step 4. Scroll down and select Turn off fast startup.
Step 5. Restart your PC.
You can now proceed with the installation process.
7. Disable NFC
NFC stands for Near Field Communication, and it enables you to use mobile phones to pay for things like coffee, tickets, and even groceries just by tapping them together. But while NFC is convenient, there are some security concerns. Here are 7 ways to disable NFC on your computer.
1. Open Device Manager
2. Click “View installed hardware”
3. Find “Near field communication controller”. Right-click it and select Properties
4. Select the tab labeled “Security”. You’ll see a list of items that require permission to access the device. Uncheck everything except “Allow the app to make calls.”
5. Restart your PC.
6. Reopen Device Manager and check again. If you still don’t see anything listed under “Near field communication”, try rebooting your machine one more time.
Is the use of your CPU back to normal?
Task Manager is a great tool for seeing what processes are running on a computer. But it doesn’t tell you much about why those processes are running. To help you understand what each one does, we’ve put together a list of common tasks and how they affect your system. You might even find some unexpected uses for some of these tools.
CPU usage is a measure of how busy a processor is performing calculations. When a program runs, it takes up resources like memory and processing power. If a task needs more resources than it has, it slows down the whole machine.
When you open Task Manager, you’ll see three tabs: Performance, Memory, and Services. Each tab provides different information about the system.
Performance Tab
The Performance tab displays data about how fast your computer is working. This includes things like how many frames per second (fps) your video card is displaying, how long it takes to load webpages, and how quickly programs start up.
This section is where you’ll want to check out the CPU usage. If there’s too much activity happening, it could mean that you’re experiencing laggy performance.
RECOMMENATION: Click here for help with Windows errors.
Frequently Asked Questions
Is it safe to stop the Wudfhost.exe process or turn it off?
If you’re having problems with your computer freezing up, crashing, or rebooting unexpectedly, there are a few things you can do to troubleshoot the issue. One thing you might try is stopping or disabling the wudfhost process, but doing so is risky because it could cause Windows to crash and reboot.
The wudfhost process is a critical system process that loads drivers and interfaces with components. As such, it cannot be stopped or disabled permanently. Instead, you’ll want to use one of the following methods to temporarily stop or disable the process:
* Right-click on the wudfhost service name and select “Stop.”
* Press Ctrl+Alt+Delete to open Task Manager, locate the wudfhost entry, right-click on it, and select “End task.”
You can also restart the wudfhost without causing a BSOD. But it takes some work.
Is WUDFHost a Virus?
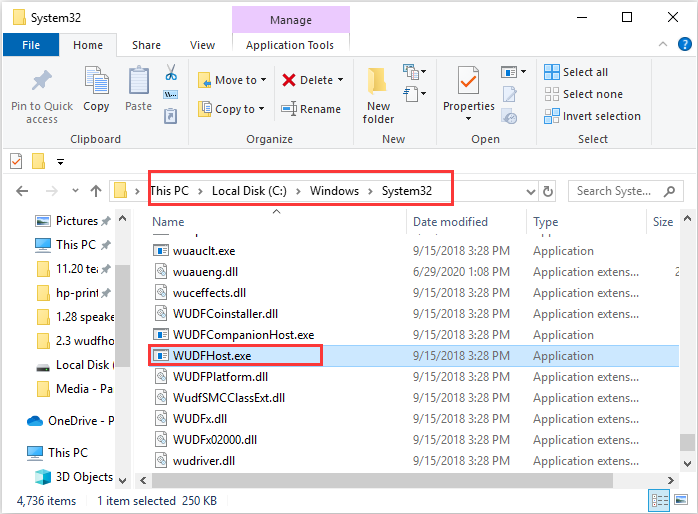
The Windows User Defined Host File (WUDFHost) is a tool used by Microsoft to manage host files. This tool allows users to change the hosts file without having to make changes manually. But what happens if there are errors while changing the hosts file? A hacker could easily use this tool to infect computers with malware. In fact, many people mistakenly believe that this program is a virus. However, this isn’t true. There are no viruses associated with this tool. You can safely delete this file if you’re concerned about security issues. To do so, open Task Manager and go to Processes tab. Look for the process named WUDFHost.exe. Right-click it and select “End task.”