- Download and install the software.
- It will scan your computer for problems.
- The tool will then fix the issues that were found.
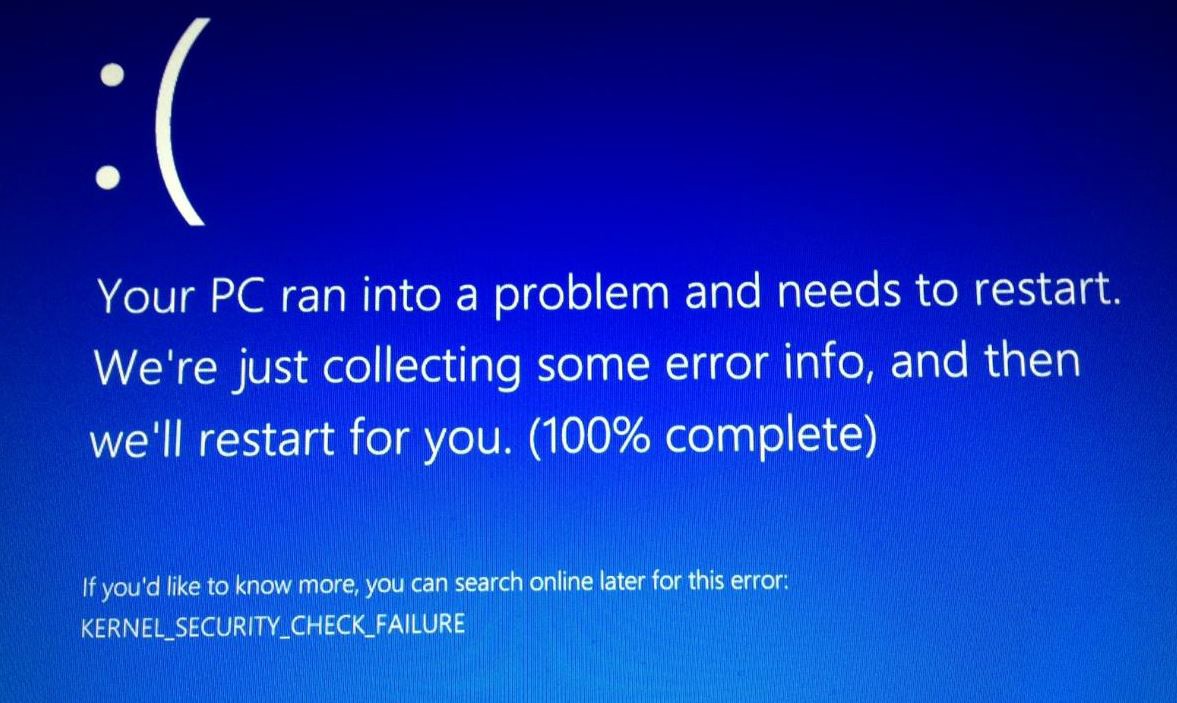
If you are getting STOP KERNEL_SECURITY_CHECK_FAILURE error or blue screen on Windows 10/8/7, this article contains some troubleshooting steps that you might want to try. This error is usually caused by memory or driver incompatibility issues, or system data corruption.
The KERNEL_SECURITY_CHECK_FAILURE error check is 0x00000139. This error check indicates that the kernel has detected damage to a critical data structure.
Reason for failure of kernel security check
Kernel security check errors usually occur during computer startup, shutdown, or hibernation. In most cases, the problem occurs after a Windows update or RAM upgrade.
Some issues can cause the kernel security check to fail. The most common ones are outdated drivers, a damaged hard drive or RAM, or a virus or malware infection. However, the error can also be caused by corrupted Windows operating system files.
There are a few things that we can do to fix this error.
Force Windows to Full Shutdown
Turn off the system completely to restart Windows at startup. Do it:
- Press the power button, hold down the SHIFT key on your keyboard, and then press “Turn off”.
- Turn your computer on.
- Check to see if the BSOD kernel security check error has been resolved. If so, turn off the quick start function permanently.
Check your Memory and Hardware
To check for disk problems, open the Start menu, click Search, type chkdsk / f C: and schedule a disk scan the next time your computer restarts. Before restarting, make sure that you are doing everything correctly – it may take a long time to scan your hard drive. If you have already taken all necessary precautions and decided to restart your computer immediately, your computer may stop working within the next few hours, depending on the size and speed of your hard drive.
Updated: July 2025
We highly recommend that you use this tool for your error. Furthermore, this tool detects and removes common computer errors, protects you from loss of files, malware, and hardware failures, and optimizes your device for maximum performance. This software will help you fix your PC problems and prevent others from happening again:
- Step 1 : Install PC Repair & Optimizer Tool (Windows 11, 10, 8, 7, XP, Vista).
- Step 2 : Click Start Scan to find out what issues are causing PC problems.
- Step 3 : Click on Repair All to correct all issues.

Check to see if the Windows file system is damaged.
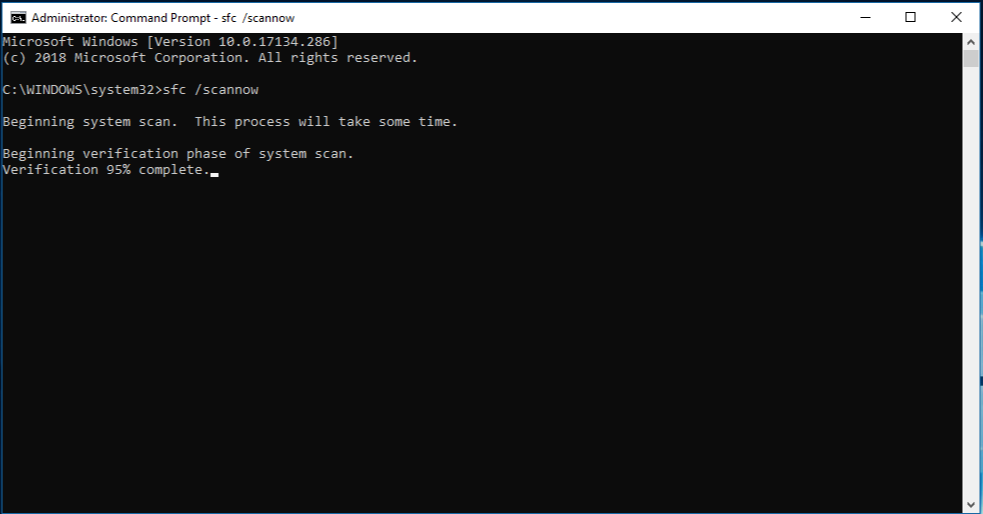
Run a system file checker to see if the kernel security check fails due to a damaged or corrupted file system.
Run this utility if you have changed or replaced system files during the operating system setup. Also, run this tool if you suspect that another program has changed your system files, although it is unlikely that you are using Windows Vista, 7, 8 or 10. This is because these versions include a system file checker. All critical system files are in secure mode. Even if something changes, the original file is automatically recovered from the cached copy of the folder.
To launch this tool, open a command line, type “sfc / scannow” and press Enter. This tool will run and replace damaged cache files when you restart if something goes wrong.
Enable legacy upload policy
If you are unable to log into your Windows computer, go to Advanced Startup Options and open an elevated Command Prompt window. There the process is explained in detail.
On this screen, select Troubleshoot> Advanced Options> Command Prompt. CMD provides easy access to advanced built-in Windows tools.
If you want to access these advanced boot options directly in Windows 10, you can do so in the Windows 10 Settings> Update & Security> Recovery> Advanced Boot app and click the Restart Now button.
Now you need to enable the legacy startup policy. Type the following command and hit Enter:
bcdedit / set {default} bootmenupolicy Legacy
You can now log into your Windows desktop or Safe Mode to get the above troubleshooting guidelines.
RECOMMENATION: Click here for help with Windows errors.