- Download and install the software.
- It will scan your computer for problems.
- The tool will then fix the issues that were found.
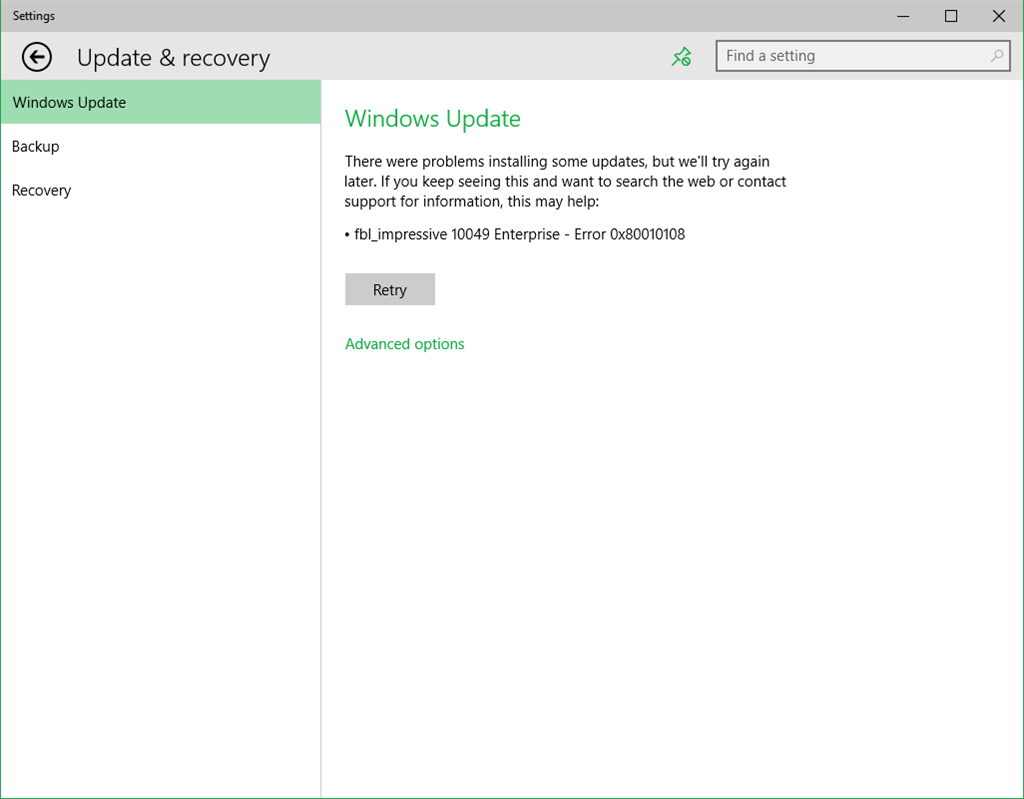
If you encounter error 0x80010108 while trying to update Windows 10, then you have come to the right place as today we are discussing how to fix this error. Running the Windows Update troubleshooter won’t help, but it’s worth trying as it can fix the underlying problem in some cases. The root cause of this error is the Windows Update service.
This error can be corrected by restarting Windows Update and re-registering wups2.dll. So, without wasting time, let’s see how to fix Windows Update error 0x80010108 using the troubleshooting guide below.
Run Windows Update Troubleshooter
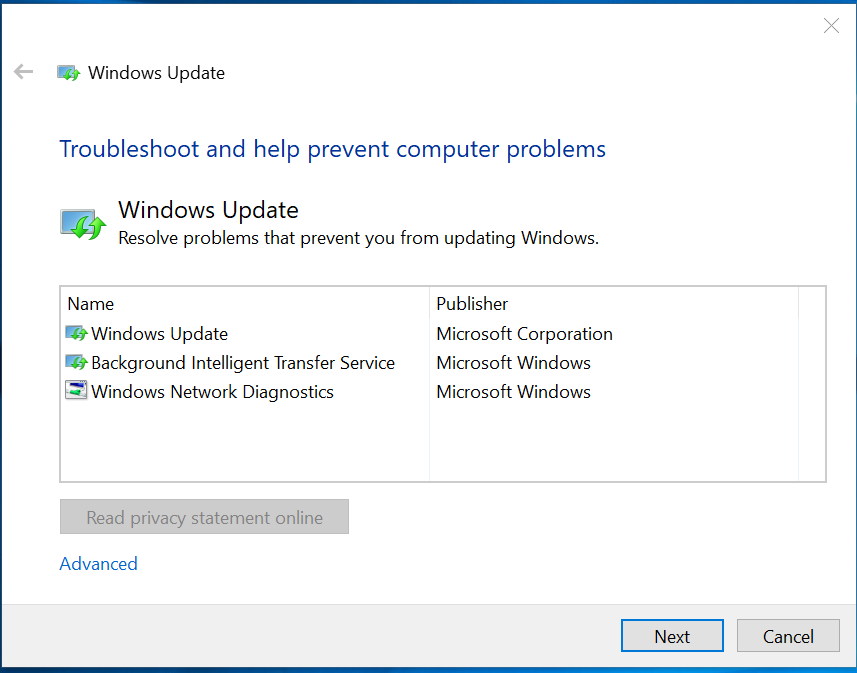
I suggest you run the Windows Update troubleshooter and see if it helps fix the problem.
- On the Find tab, enter the type you want to resolve and press Enter.
- Select system and security
- Click the Windows Update troubleshooter and follow the instructions on the screen.
Restart Windows Update service.
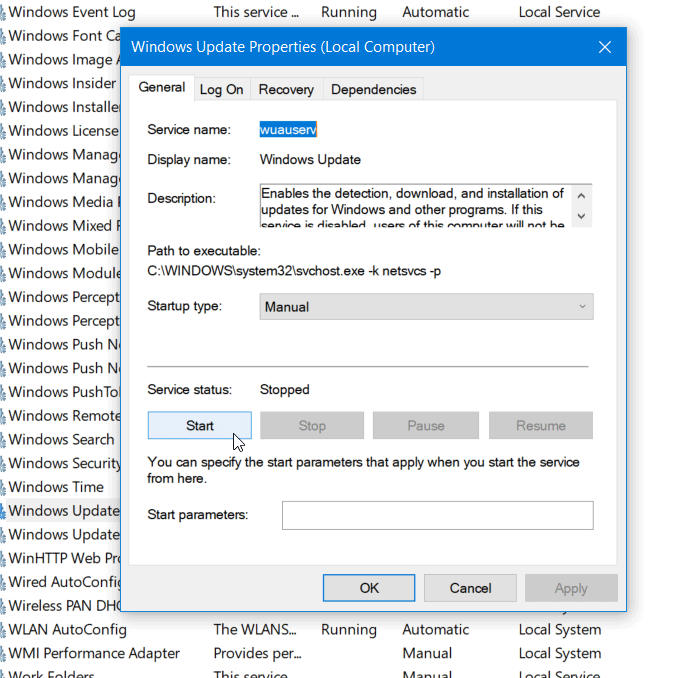
- Launch an elevated command prompt by typing cmd from the Start menu, right-clicking Command Prompt, and choosing Run as Administrator. Or you can press Windows + X and then select Windows Powershell (Admin). Accept the UAC prompt if it appears.
- Enter this command on the command line. Stop stop wuauserv net start wuauserv
- Try running Windows Updates again to see if the issue is resolved. If the problem persists, go to method 2 and try again.
Resolve network problem
Certain network issues can cause error 0x80010108. Therefore, pay attention to the following:
- If you are using a proxy, stop using it.
- Try installing apps without using a VPN.
- Use a different network.
- Flush DNS cache
Check your Windows Live Essential software settings.
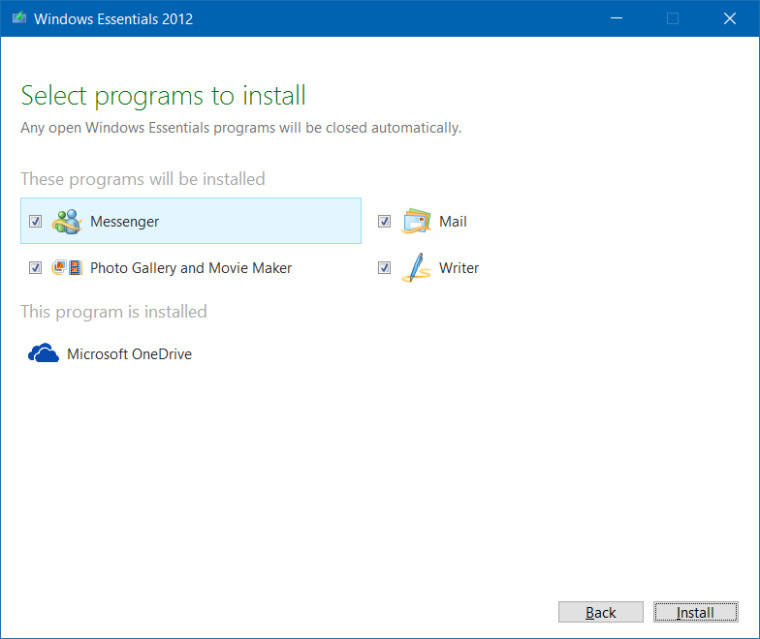
To restore the Windows Live Essential software settings, go to the Start menu and click Control Panel.
Now go to the “Programs” option in the Control Panel. In Programs, click the Programs and Features tab, click Windows Live Essentials, and then click the Recovery tab. After completing the configuration, restart your computer for the changes to take effect.
- Enable User Account Control
- Press Windows Flag + X and click Control Panel.
- Go to Control Panel> User Accounts> User Accounts.
- Click Change Account Settings for User Management.
- Drag the bar up to set “Always notify”.
RECOMMENATION: Click here for help with Windows errors.