- Download and install the software.
- It will scan your computer for problems.
- The tool will then fix the issues that were found.
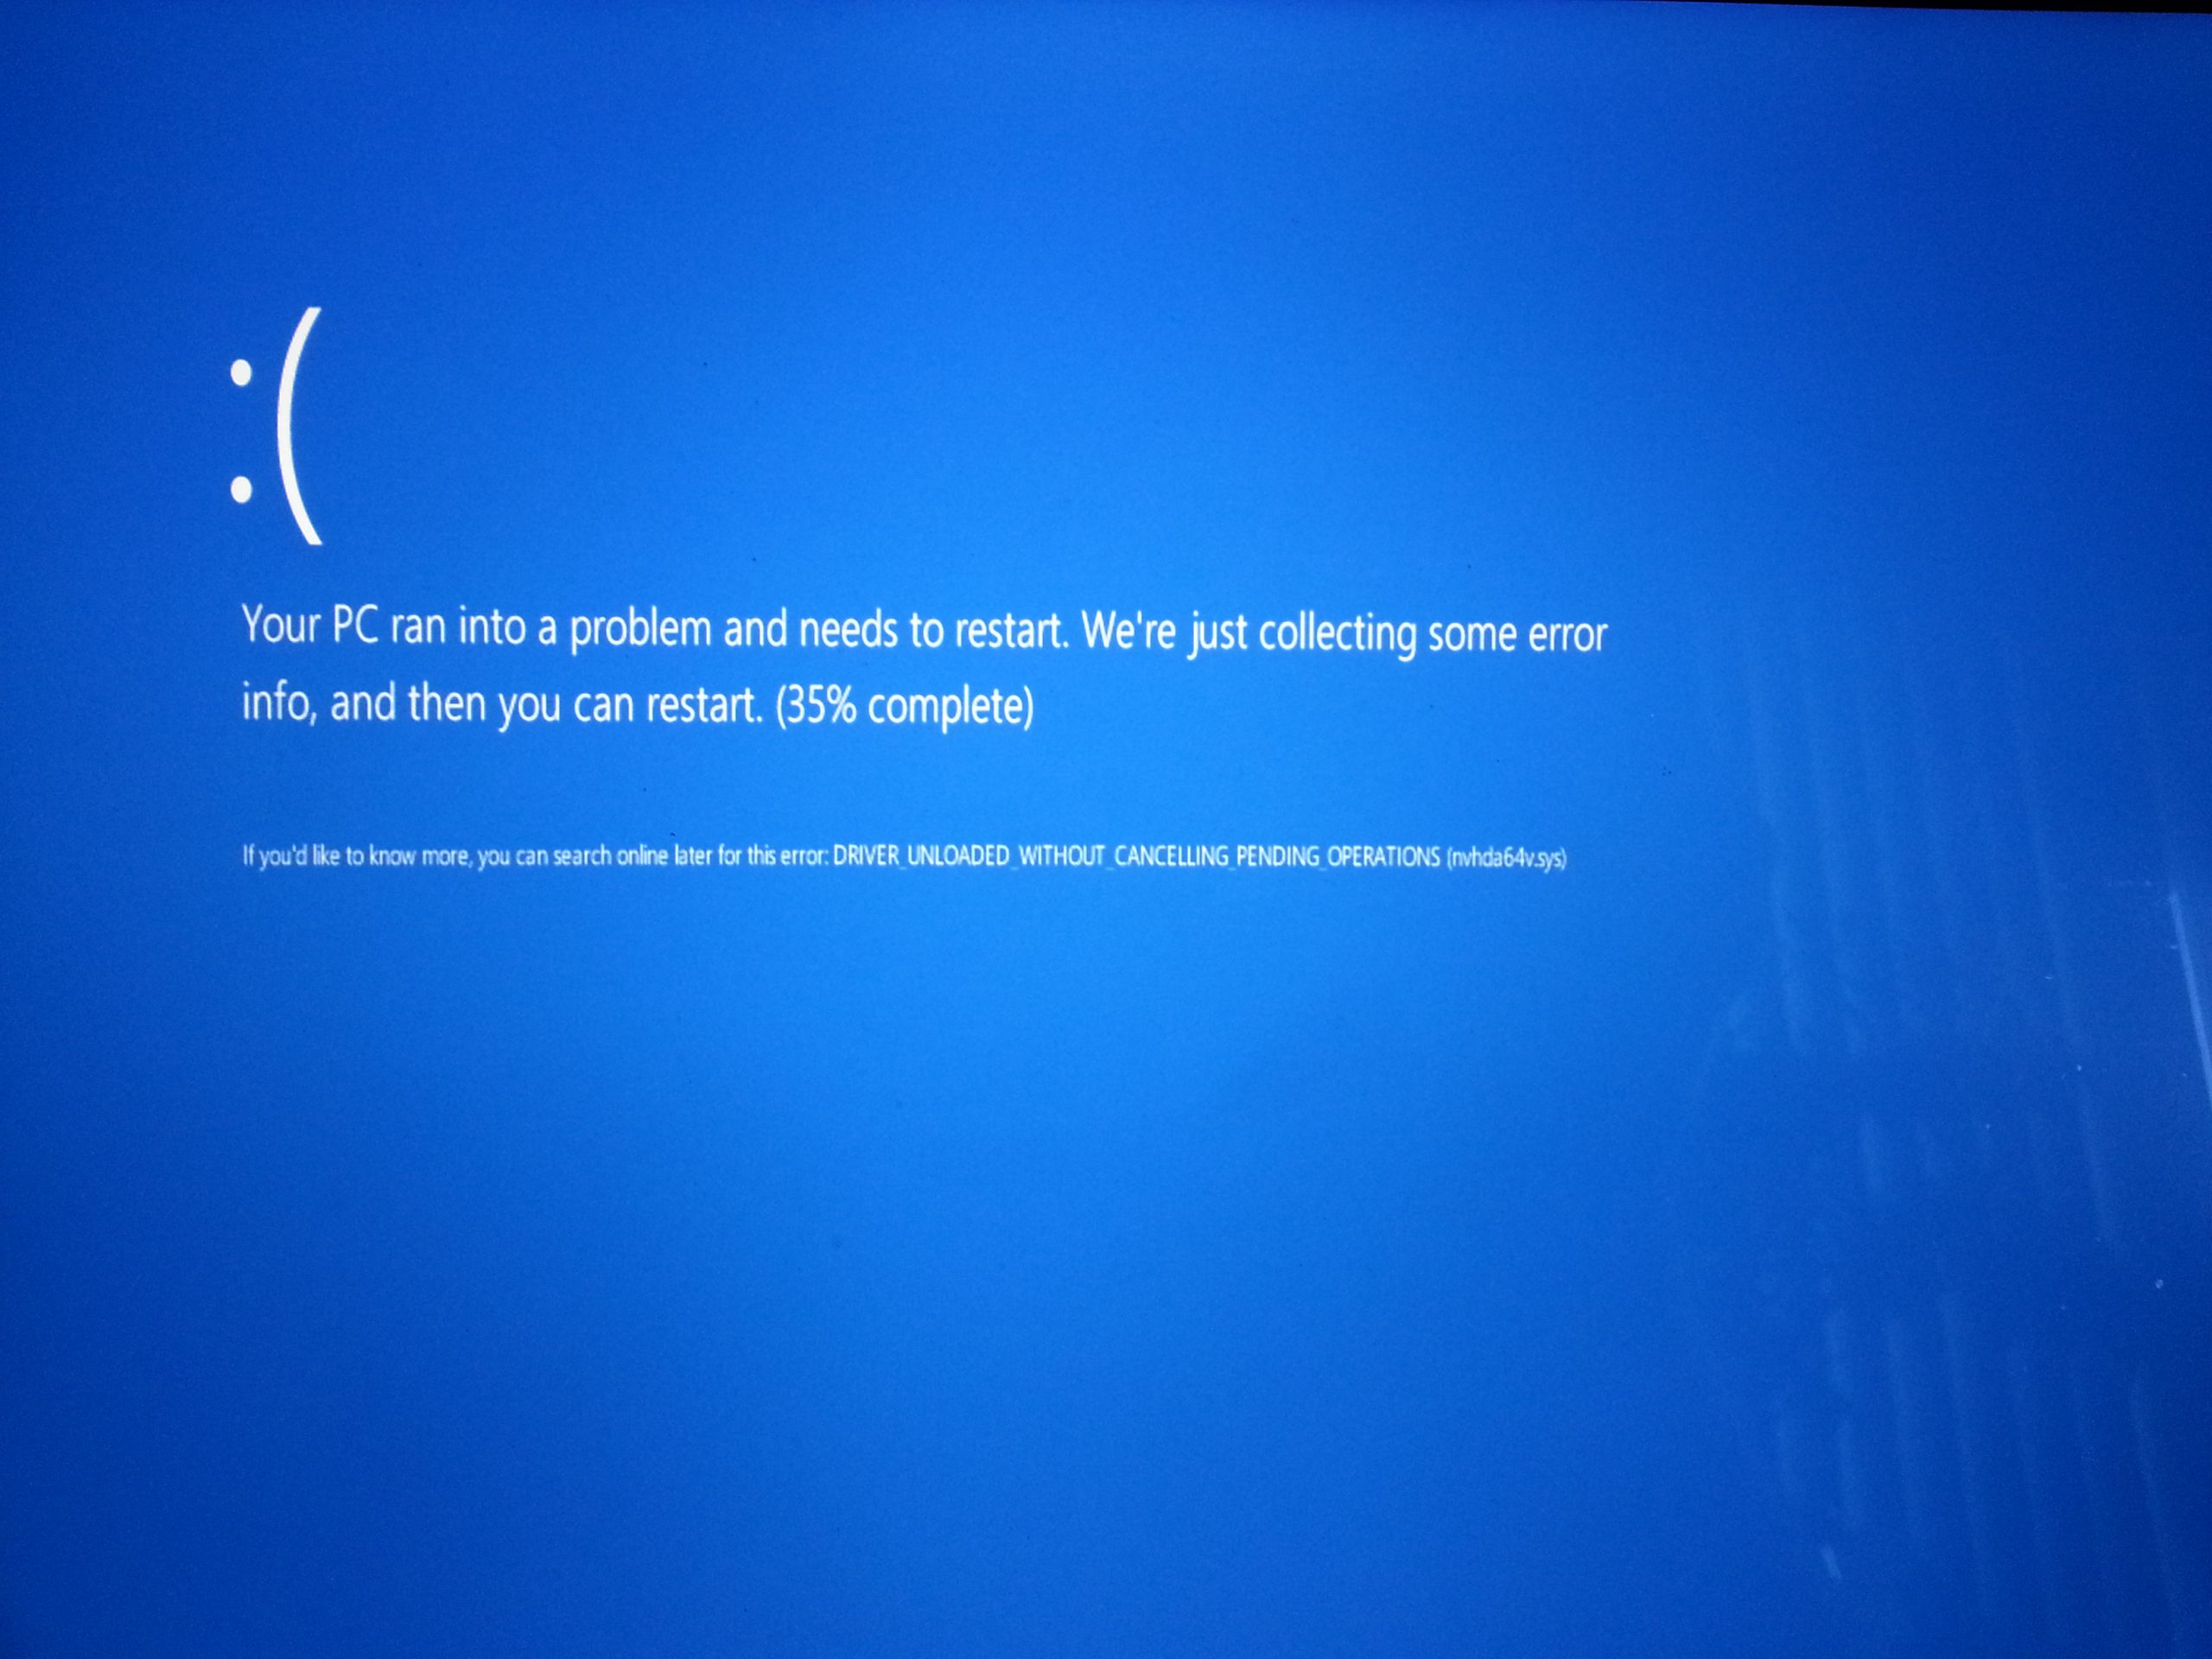
BSOD (Blue Screen of Death) pointing to intelppm.sys appears for some Windows users when they try to install a new driver update or run a resource-intensive game or application. Looking at the error code, there is a problem with the device processor driver.
The first thing you need to do if you want to fix this particular problem is to run a number of utilities that can be used to repair corrupted system files. Several affected users have confirmed that they fixed this issue after quickly running SFC and DISM scans. In more serious circumstances, you may need to take more drastic measures, such as: B. clean install or repair installation of your version of Windows.
If you’ve manually overclocked the CPU voltage and frequency, reset them to their default values. Higher temperatures than usual or insufficient power consumption are good reasons why intelppm.sys-related crashes can occur.
On some models, a BIOS error can also be the cause of this unexpected BSOD. In this case, installing the latest firmware available for your GPU should fix the problem. If you’ve never done this before, you should also clear your CMOS battery to make sure there are no nested logs that might be causing this issue.
How can you solve this problem? To fix the problem, follow these steps:
Modify Registry Entries
Editing the registry and restarting your computer should fix the problem at the end.
- Type “regedit” in the search box and just press Enter.
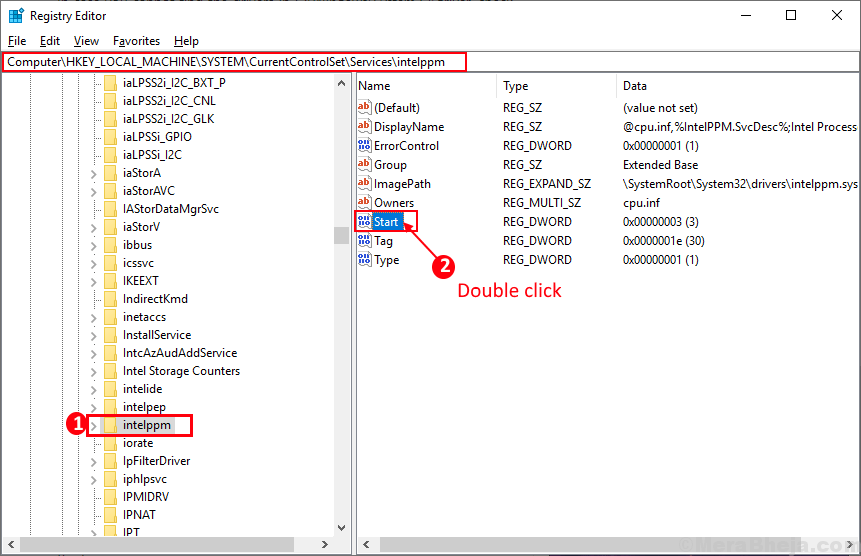
- Go to the title of this key.
HKEY_LOCAL_MACHINE \ SYSTEM \ CurrentControlSet \ Services \ Intelppm - Now double-click the “Start” DWORD value on the right to edit it.
- Then set the data value to 4.
- Then click “OK” to save the changes to your computer.
Close the Registry Editor window.
Restart your computer for the changes to take effect.
After restarting the device, the “intelppm.sys” error message no longer appears.
Disable Intelppm.sys
- Connect the Windows installation CD to the virtual machine (Parallels Desktop main menu -> Devices -> CD / DVD-ROM).
- Change the boot order of the virtual machine to boot from CD (Parallels Desktop Main Menu -> Virtual Machine -> Configure -> Boot Order)
- Start the virtual machine.
Updated: June 2025
We highly recommend that you use this tool for your error. Furthermore, this tool detects and removes common computer errors, protects you from loss of files, malware, and hardware failures, and optimizes your device for maximum performance. This software will help you fix your PC problems and prevent others from happening again:
- Step 1 : Install PC Repair & Optimizer Tool (Windows 11, 10, 8, 7, XP, Vista).
- Step 2 : Click Start Scan to find out what issues are causing PC problems.
- Step 3 : Click on Repair All to correct all issues.

- Immediately after starting the virtual machine, press Ctrl + Option + Command + Command + R and accept manual mode.
- After unlocking the console, save your entries and press any key to boot the virtual machine from the CD.
- When you see the first Windows command line, enter “R” to access the Recovery Console.
- In the recovery console, wait for the prompt to select an installation, enter “1”, then “Back” and enter the administrator password.
- Run the following command: Disable Intelppm
- The current status of the SERVICE_DISABLED service is displayed.
- Exit the Recovery Console by typing “Exit”.
Reboot the virtual machine. Windows should start correctly.
REGEDIT update
In REGEDIT, change the “Start” data field to 4:
“HKEY_LOCAL_MACHINE \ SYSTEM \ ControlSet001 \ Services \ Intelppm”
or
HKEY_LOCAL_MACHINE \ SYSTEM \ CurrentControlSet \ Services \ Intelppm
You can also do one of the following:
- Renamed to C: \ Windowsystem32 \ drivers \ intelppm.sys and intelppm.no-sys.
- Delete or rename the Intelppm.sys file in the system32 drivers. You can do this through the Recovery Console.
- Boot from the Windows CD and launch the Recovery Console on the target partition. Enter “disable Intelppm” to disable the driver. A new beginning
RECOMMENATION: Click here for help with Windows errors.